HANDLING CUSTOMER RETURNS
As you sell and manage your business for weeks, months, years, it is inevitable that you will receive a request from a customer to issue a return or a refund. The tips offered here in this blog are by no means exhaustive and all-inclusive of all the possible situations. Hopefully, you may glean a few helpful tips. Here are some helpful tips for managing these situations:
Be sure to set up a clear return policy on your website or on-site pop ups/craft fairs.
Be clear if you accept returns.
State your return policies—refund if returned within a certain number of days, item returned in good condition and more.
State how the refund, if any will be issued.
If you do not accept returns make it very clear on your website or at your popups with clear signage.
State what you will do if the item was received by the customer damaged, not received, or broken, or if they plain do not like the product for any reason—doesn’t fit, color looks different, no longer needed, etc.
Set up clear communication with your customer and be very polite and cordial.
Take a stance of wanting to help your customer. After all, they took the time to shop with you and to purchase your product.
See if you can come to a good resolution—offer to refund or repair/fix whatever is wrong for the customer.
Do not take offense or get defensive. These things happen. People are human.
Be helpful and thank them even if you think they are wrong. It’s okay. Set a good reputation for your business, settle the matter and move on.
Take extra steps to help your customers. They may even return to shop one day.
Craft Fair Checklist For Vendors
If you are just starting out as a vendor participating in craft fairs, here is a helpful checklist of items that you may want to bring. It is by no means all inclusive and some things may not be pertinent to you depending upon what you sell, but hopefully, this can serve as a starting point for you!
Your crafted merchandise
Table to display your items
Chair or chairs to sit on
Display racks to display your crafts so that everything doesn’t just lay flat on the table.
Tent, if outdoors.
Tent weights
Cash box or something to hold your money.
Enough change to last throughout the fair.
Credit card reader to take card payments. Customers will purchase more by credit card than with cash.
Receipt book to write receipts.
GE Tax License to display
Necessary certificate of insurance if required by the craft venue.
Cart or wagon to transport your merchandise and equipment from your car to the booth space.
Fan—manual or battery operated if the event is outdoors during warm weather.
Food and drink for the day. Pack your own lunch and meals and drinks because you may not have the opportunity to purchase your meals if the fair is busy and you also save money not buying expensive craft fair food.
Business cards to pass out to customers.
Packages to put merchandise in after customers make a purchase.
Signage for your table to indicate prices, item names, and any sales or deals you may have going on. Clear signs help to inform your customers in the event of a busy fair where you cannot converse with each customer.
A smile. A friendly face and demeanor will go a long way in welcoming your customers and showing that you are warm and caring.
Lighting if the event is not well lighted or if the event will take place during the evening.
Customer Rapport At Craft Fairs: How To Make More Money
So, you made all of your inventory, packed up, set up at your craft fair venue and now what? Customer rapport is extremely important at craft fairs and it can make a huge difference in the number of sales you make for the day. Here are a few tips for you that might help you to make more sales. You might want to try some of these tips out at your next craft fair and see if they help you to make more sales and thus, more money that day. Here goes!
Greet each customer that comes to your booth with a friendly hello and smile. Just looking friendly will help customers to feel welcome. This versus being unengaged and bored looking just at your phone.
Strike up a conversation with your customer. For example, “Nice day isn’t it?” Or something generic. This shows you are warm and friendly. If it is a seasonal craft fair such as Christmas time, you could ask them if they started their Christmas shopping yet and give them some great gift ideas from your booth.
Beware of the customer who takes up all of your time and attention. I once had a customer that came and asked all kinds of questions about a custom order she was interested in. She pulled out many items and told me to put them on the side for her. She took up over half an hour of my time while other customers were there and left. In the end this customer never made a purchase and I probably lost out on a lot of sales because it was a really busy night. In this case, what I should have done was politely excuse myself and greet the other customers. This customer finally left my booth. The rest of the night was busy. At the end of the night, while it was time to pack up, this same customer showed up at my booth asking if she could come to my house and take a look at all of my inventory. I declined the offer. She kept talking. All of the other vendors packed up and left and I was the last vendor left. Finally, she asked for my business card so that she could contact me further. I quickly gave her my business card and she left. I finally packed up for the night about an hour later. The next day, this same customer emailed me saying that my phone number was not on my business card (yes, I do that on purpose). I politely told her that she could correspond my email. The customer never did buy or order anything. There are customers who can take up all of your time and attention. Be sure to pay attention to every customer who comes to your booth and not let any one customer monopolize your time. This can result in a loss of sales.
Beware of the acquaintance who stops by your booth. It is inevitable that you will see people you know at the craft fairs. They may come by and talk story with you. I was once at a two hour market. There was only two hours to make all of your sales. Half an hour into the market, someone I knew stopped by and started talking. She talked on and on and customers came and went. This took up a good hour. Needless to say, not many sales were made that day. If that were to happen again I would keep it brief and tell them that I’d talk to them later and to have a good day. A fair is not the time to chat with friends. It’s a time to market and sell your products.
Beware of the creepy dudes. Sometimes there are customers whose actions are totally inappropriate. Do not engage in conversation with them. Keep your talk brief and move on to another customer. I once had a creepy dude keep coming back to my booth and he didn’t intend to buy anything. So ignore them, be firm, or call security. Engaging with these people will not gain you any sales.
Recognize repeat customers. You will soon learn to recognize repeat customers. You may want to reward them with a discount or a free gift or just a plain thank you. I had a customer show up once at my booth and I commented on how beautiful her earrings were. She replied, “Yes, you made them.” On closer inspection, I realized they were mine! She told me she bought them from me at another fair. You may not realize it, but the same customers may come back to shop from you. It might be good to start or to have some type of rewards program for your business.
Living in Hawaii, I have been a vendor at many craft fairs in Waikiki. It is always an interesting conversation to see if the customers are tourists or locals, and I always ask where they are from. This lets me know what they might be interested in purchasing as well. I’ve met customers from Israel, Australia, Japan, France, Italy, the continental United States, and more.
Customers are a vital part of your business. It is a good idea to spend time greeting and establishing rapport with them. You may find that your sales will increase as you do so.
Tips For Selling More At Craft Fairs—The Importance Of Signs And Labels
Hello everyone. So, you have begun to sell at craft fairs and markets. Here I will discuss how to sell more at your vendor events by having clear signs and labels in your display. This will help you to sell more at your events. Here are my reasons and tips:
When customers walk up to and pass your booth, your display will either draw them in to shop, or make them walk right on by. Having clear signs and labels tells them in a split second what you have to offer and about your products. Customers will not try and hunt for the information.
Have a sign with your business name and what it is that you sell. Display your company name with a brief description of what you sell. My company name is Gifts By Karen M. The description on my sign says Hawaii Handmade Jewelry & Gifts. So my customers know exactly what it is that I sell. The sign should be easy to read in font and in size. I’ve been at fairs where vendors has no company name whatsoever posted up and customers tended to shop at booths will a business sign posted rather than nameless booths. I believe a business sign or banner signifies credibility and trustworthiness. It makes you look like a legitimate business.
Make sure that your products are clearly labeled with what it is, if it is not obvious and with the pricing. This will tell the customer if they can afford to shop at your booth and if they are interested in that particular product. If there is no price on the product the customer may not wait until you are available to ask what the price is especially if your booth is very busy. If a particular category of items are all the same price you need not label each individual item, but you can put a sign for that group of items. For example, Rings—$5 each. You can group items by similarity fir ease in shopping—putting all the rings in one place, all of the earrings on one display stand, etc.
You may want to label a section for clearance items. I always have a bargain bin of clearance items that I sell for a discounted price and I label it as such with the price. My bargain bin is very popular with the shoppers. It draws people in to my booth.
Label special ingredients or materials to tell customers what things are made of. For example, Rose Quartz Ring, or Gold Filled Metal, or nickel free jewelry. The more information you can provide, the better shopping experience for the customer. This past weekend, I was a vendor at a huge event. It was the King Kamehameha Day Festivities Hoolaulea. Thousands of people attended. One customer was looking at my rings. Then she asked what it was made of and I told her it each one was labeled. Then apparently, she couldn’t speak or read English! So, although labels don’t help everyone, they are still useful to the majority of the population. I had hundreds of shoppers at my booth at that event and by having products labeled, each customer didn’t have to continually ask me for the price or what it was made of. Signs and labels help.
Double check your items to make sure labels/price tags are still attached to the product. They may come off from time to time, so in-between customers it’s always a good idea to check products and tidy up your display.
Be sure that signs and labels are securely attached to your display and that they won’t blow off with the wind. I use clothes pins, clamps, wire, and clear elastic to make sure that signs and labels remain in place throughout the duration of the event. Sometimes I tape the sign onto the display so that I don’t have to keep attaching a sign.
Signs and labels can reflect your display color scheme. This makes it look cohesive and attractive.
I attended an event that I knew ahead of time was not adequately publicized and that they typically had no signs put up whatsoever (yes, not a great event to choose to participate in but it was 2 minutes away from my house) so I took it upon myself to make my own sign—“Craft Fair Today” with the time on it and posted it on the fence. This helped to bring in shoppers who stopped by after seeing the sign.
I began selling at a farmer’s market. I started selling baked goods. I put them out on my table. No one was buying my baked goods. Then I printed out a sign that read, “Bake Sale.” Lo and behold, people started stopping by to purchase my baked goods. Then as a result, I started getting request customers and sales. My funny customer said my baked Banana Bread was the best in the world. She stood there telling that to the other shoppers who also began buying my baked goods. I stepped up my signage and bought a large metal sign that I could write on. I put large lettering on it and it looks a lot better than the paper printed sign I used to use. Signs help to bring in more sales.
I hope this information was helpful to you and I wish you much success in selling at craft fairs! Best wishes!
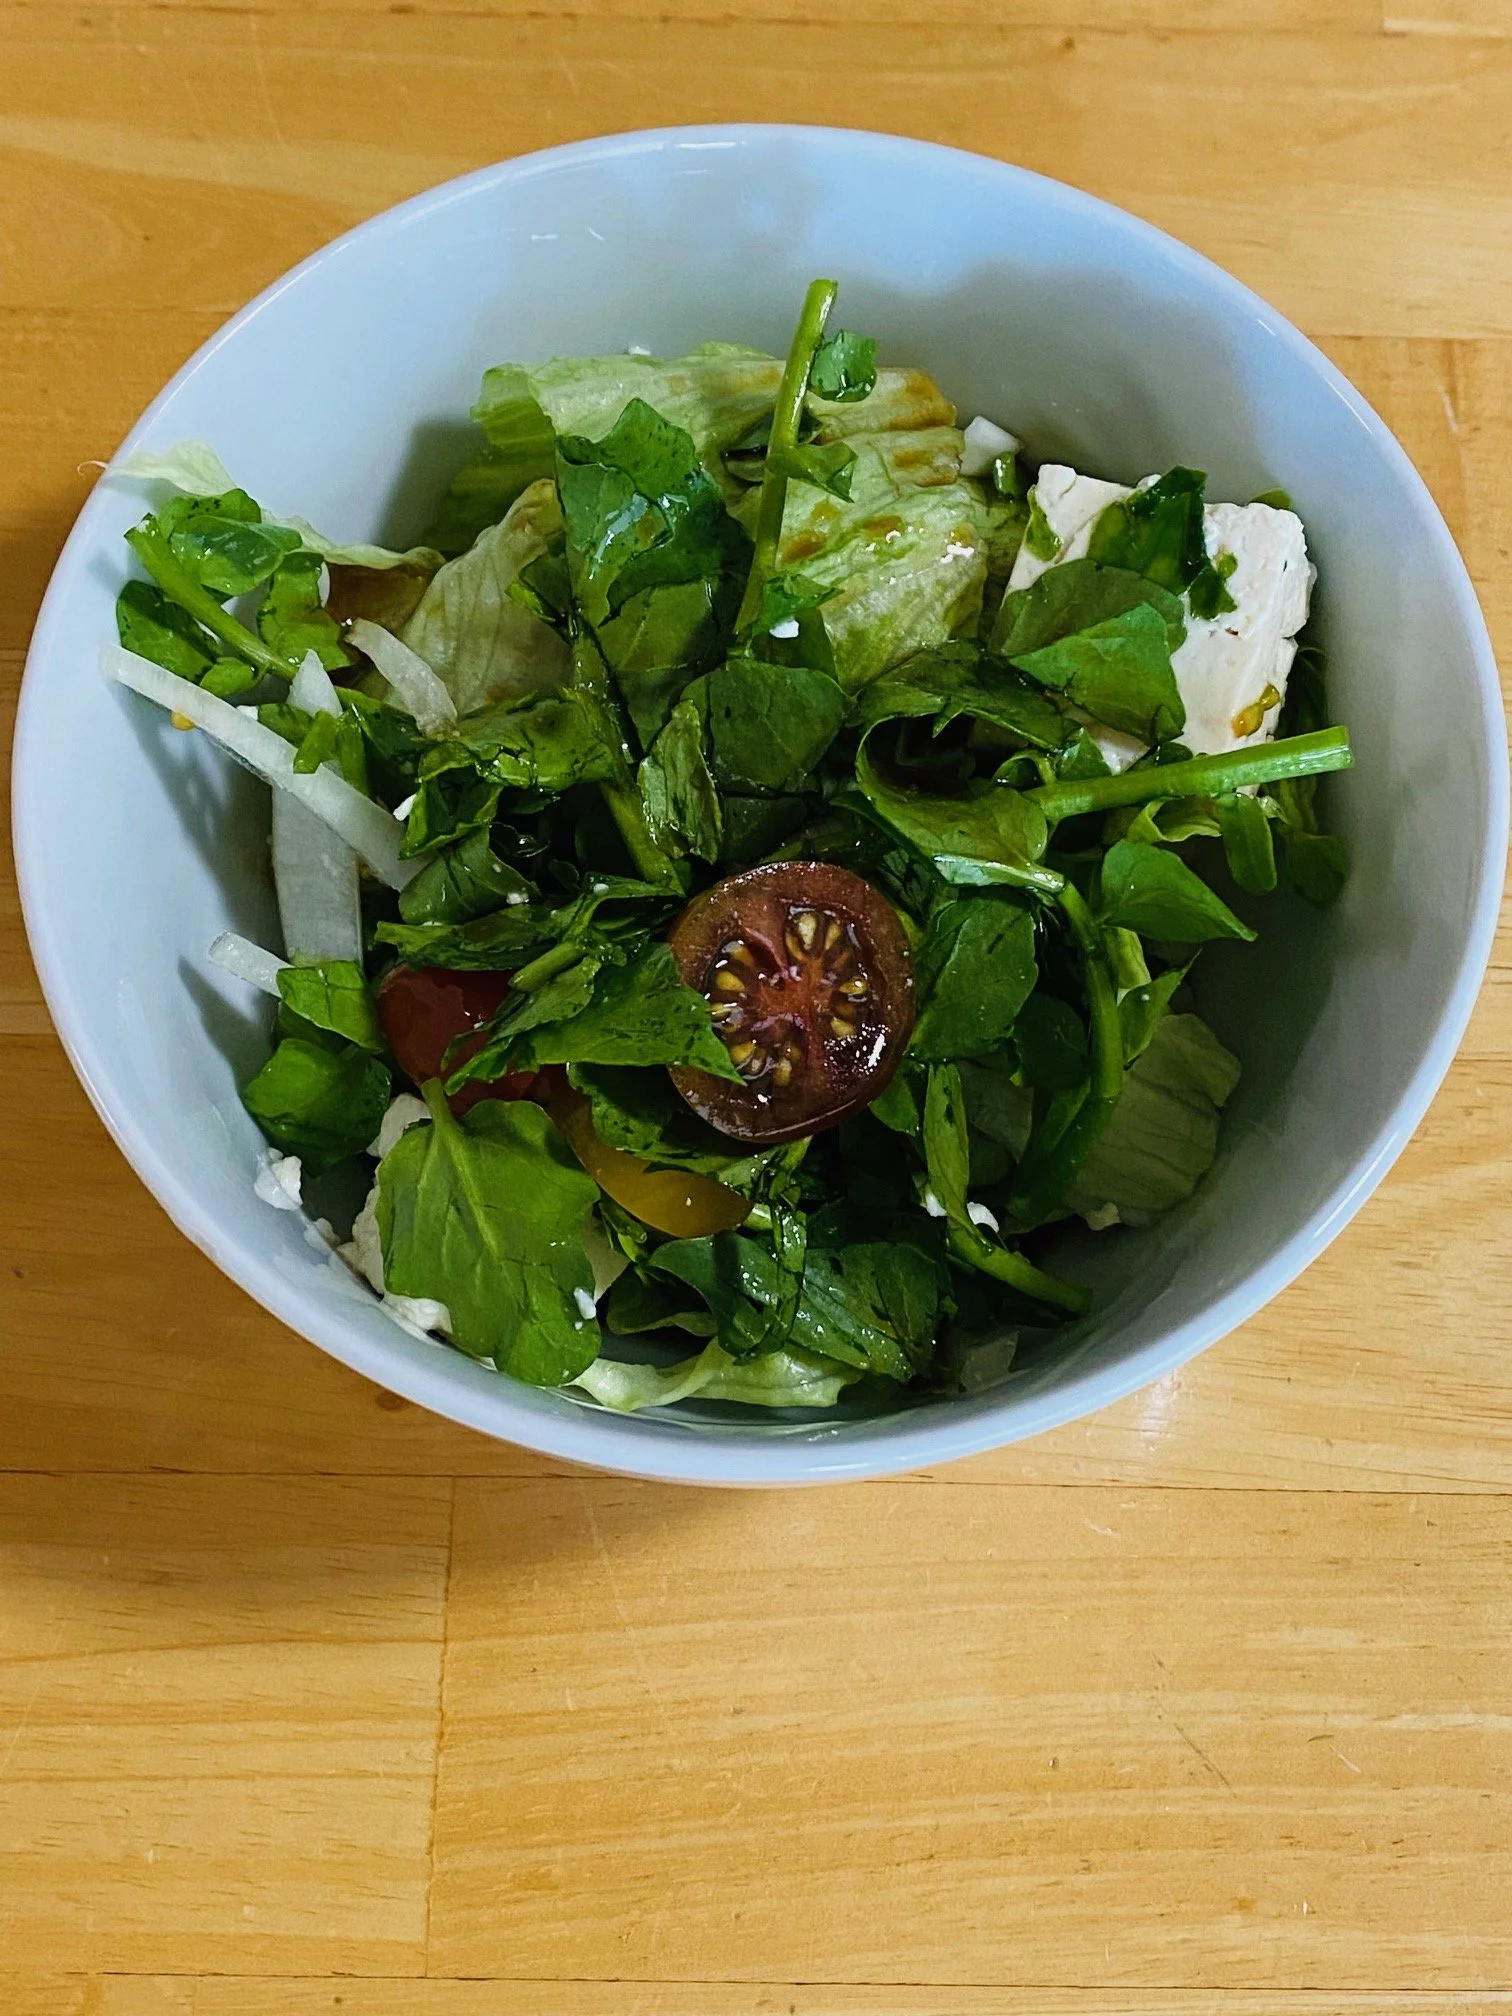
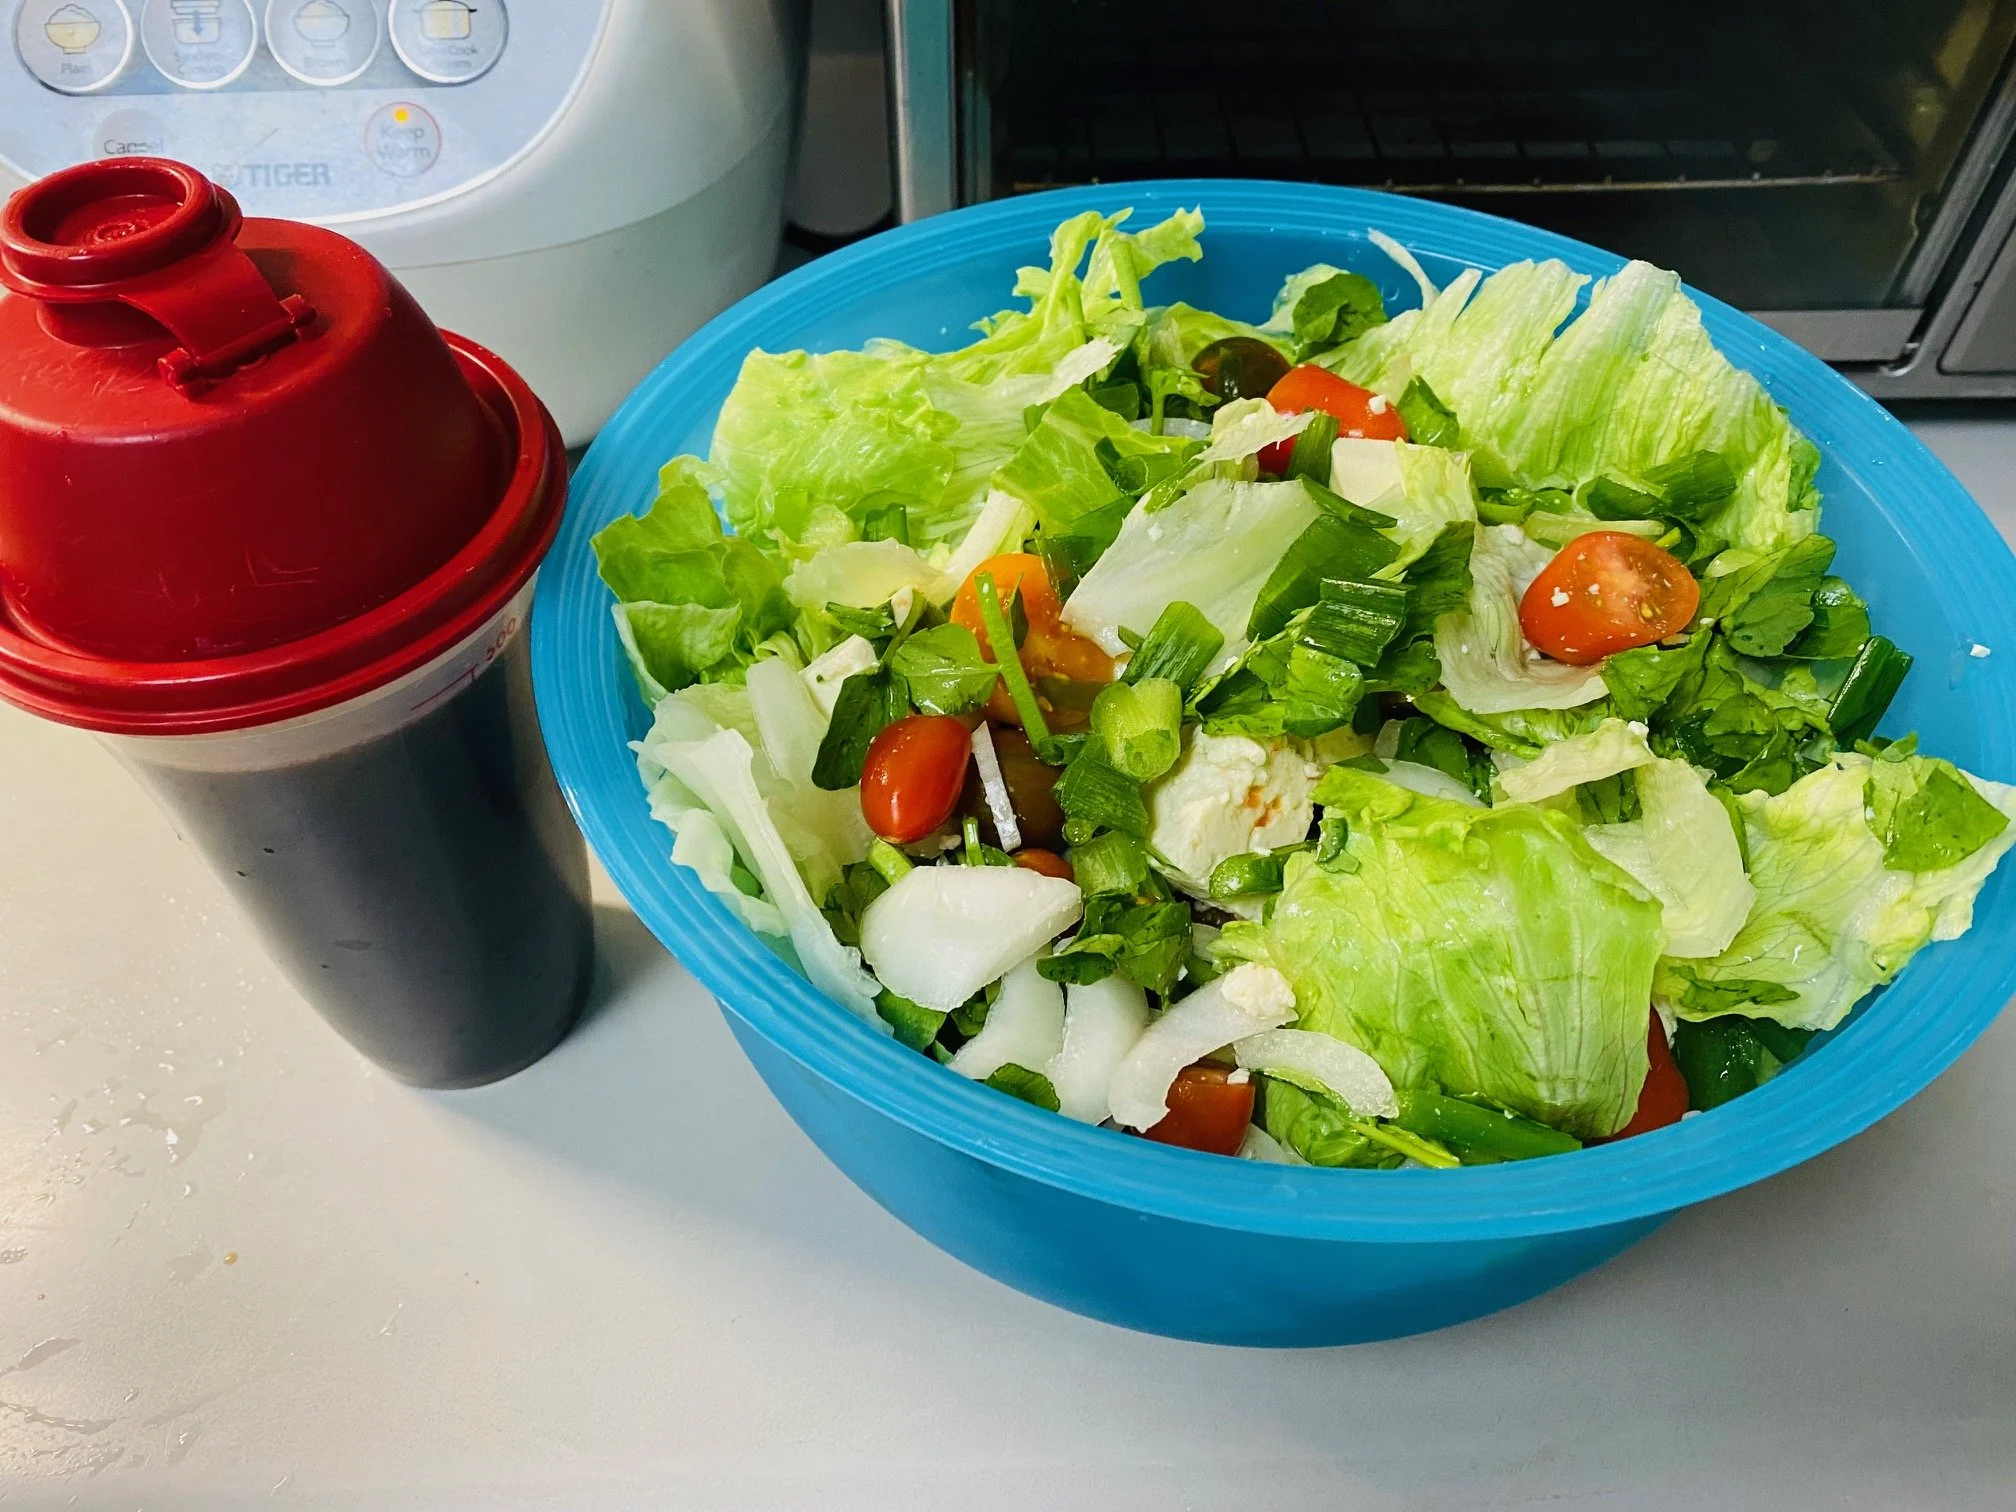
Karen’s Watercress Tofu Tomato Salad Recipe
Here is a quick and delicious, not to mention, healthy salad recipe. In fact, 34 grams of watercress contains over 100% of the RDI for Vitamin K as well as other healthy nutrients. This salad uses watercress, tofu, tomatoes, onions, iceberg lettuce, green onions, and really anything you would like to add to it. It has a delicious shoyu salad dressing that really makes this salad tasty! So, here it is!
Ingredients:
1 Block Firm Tofu cut into small cubes
Cherry tomatoes cut in half
1 bundle of watercress cut into 1 inch pieces
1/2 onion sliced
1/4 cup green onions chopped
1/2 iceberg lettuce shredded
3/4 cup shoyu
1/2 cup sugar
2 teaspoons sesame seed oil
Directions:
Mix together the greens into a large salad bowl.
Mix the dressing ingredients together and put into a salad dressing dispenser or container—shoyu, sugar, sesame seed oil.
Pour salad dressing onto salad portions to eat. Enjoy!
How To Tell If A Craft Fair Is Right For You As A Vendor
So, you have decided to sell your crafts at craft fairs. You have made your crafts and have a sufficient amount to sell them at a craft fair. How do you know which craft fair is right for you? There are many different types of craft fairs to choose from. There are different seasons for craft fairs. There are large and small events. There are craft fairs that have vendors that really didn’t make anything, they are there reselling massed produced items. There is nothing wrong with this, but just be aware that you will be competing against mass produced items verses hand crafted items. Here are some things to think about when deciding to participate in a craft fair. This is my own personal opinions and may not apply to your particular situation but perhaps you may gain new perspectives from this article.
Consider the vendor fee for the event. Is it way over your budget? Is it a reasonable amount so that you can make your fee back in sales and then make a sufficient profit? Choose a craft fair with a fee that you can afford and be able to recoup through your sales.
Some events require a COI, or certificate of insurance. If you do not have one, then you will not be able to participate in this event. However, if you are a serious crafter and will be participating in a lot of craft fairs, then you might consider getting one.
Does the craft fair require setting up a tent? If it does, then you will need to have a tent, weights, tables, displays, and more. You will also need help to set up the tent. So you will need to bring someone with you to help you. If you don’t have a tent with weights, or help, then you probably not be able to participate in this event. Some fairs do allow you to rent a tent with weights for an extra fee so this is something you may investigate if you can afford the higher fee.
Does the craft fair clientele match the items you are selling. It is a good idea to visit the craft fair before signing up to see what types of customers shop there. If you are unable to visit the fair in advance, then you might be able to ask vendors who previously participated the the fair to find out about the types of people who shopped there previously. This will give you a good idea if your crafts will sell well there or not.
Find out if possible what kind of other vendors will be there. Are there a lot of vendors selling the same type of crafts as you? If so, there might be a lot of competition there and you might not be able to sell as much.
Find out how much space you will be allotted for your booth space. Is it a sufficient amount of space for your set up? Is it too large a space where you might not have enough inventory to fill it?
Does the event have vendor parking? This is very important. I participated in an event where there was only street parking for the vendors. I had to drop off my supplies and equipment and inventory, leave it there and then go to find parking. It was such a congested area that I had to park over 4 blocks away. It was a night event and after the event was over I had to walk to my car alone. It was pretty deserted on the streets except for all of the homeless camps and people lurking in the doorways of deserted buildings. That was the last time I ever participated in that event. Parking is very important.
Another thing to consider is this—is the event well attended? Is there good advertising and signage by the event coordinator? No one likes to participate in a craft fair that is poorly attended. Low attendance equals poor sales. A poorly attended craft fair is not the best craft fair to be at for anyone.
The craft fair physical site itself is another thing to consider when choosing an event. Is it clean with spaces well marked ahead of time? Is there sufficient light there? Will you be on cement, asphalt, grass, gravel, dirt? What’s the weather going to be like at that time of the year? I attended an event that was covered with very little to no lighting there. It felt like being in a cave and customers could not see the products they were buying let alone see you there as a vendor. In this case, it might be a good idea to see the physical location for yourself. I was at another event on grass. There were red ants there biting my feet all day. This is another example of why it is a good idea to check out the venue in advance. Sometimes being on cement or asphalt can make things get really hot. If you do not like the heat, then this is something to consider. It is a good idea to find out if there are restrooms available on the site. I was at an event that had no bathrooms on site and the nearest bathroom was over 30 minutes away by car. This is another pint to consider.
There are various times of the year that may be busier than others for craft fairs. The Christmas season is usually a busy time of the year for craft fairs here in Hawaii. Craft fairs scheduled around key holidays such as Valentine’s Day or Mother’s Day may also be well-attended events. Considering the time of the year that the craft fair will be held is a major consideration for deciding whether or not a craft fair is right for you.
Your personal schedule is also a very important thing to consider. What else is going on in your life at the time of the prospective craft fair? Are there family birthdays, events, parties, etc. Will you be able to attend the craft fair?
Some craft fairs have rules that you can only sell certain items. They are non-compete events where only one vendor can sell a particular item and no one else. Attend these events only if you are fine with it being that way and if you will have a sufficient amount of things to sell if some of your items are not able to be sold.
There are many things to consider when trying to decide if a craft fair is right for you. You can consider the above points but ultimately, you will probably discover what is best through trial and error. Hopefully there are more great craft fairs that you participate in than the not-so-great ones.
Best wishes and be successful!
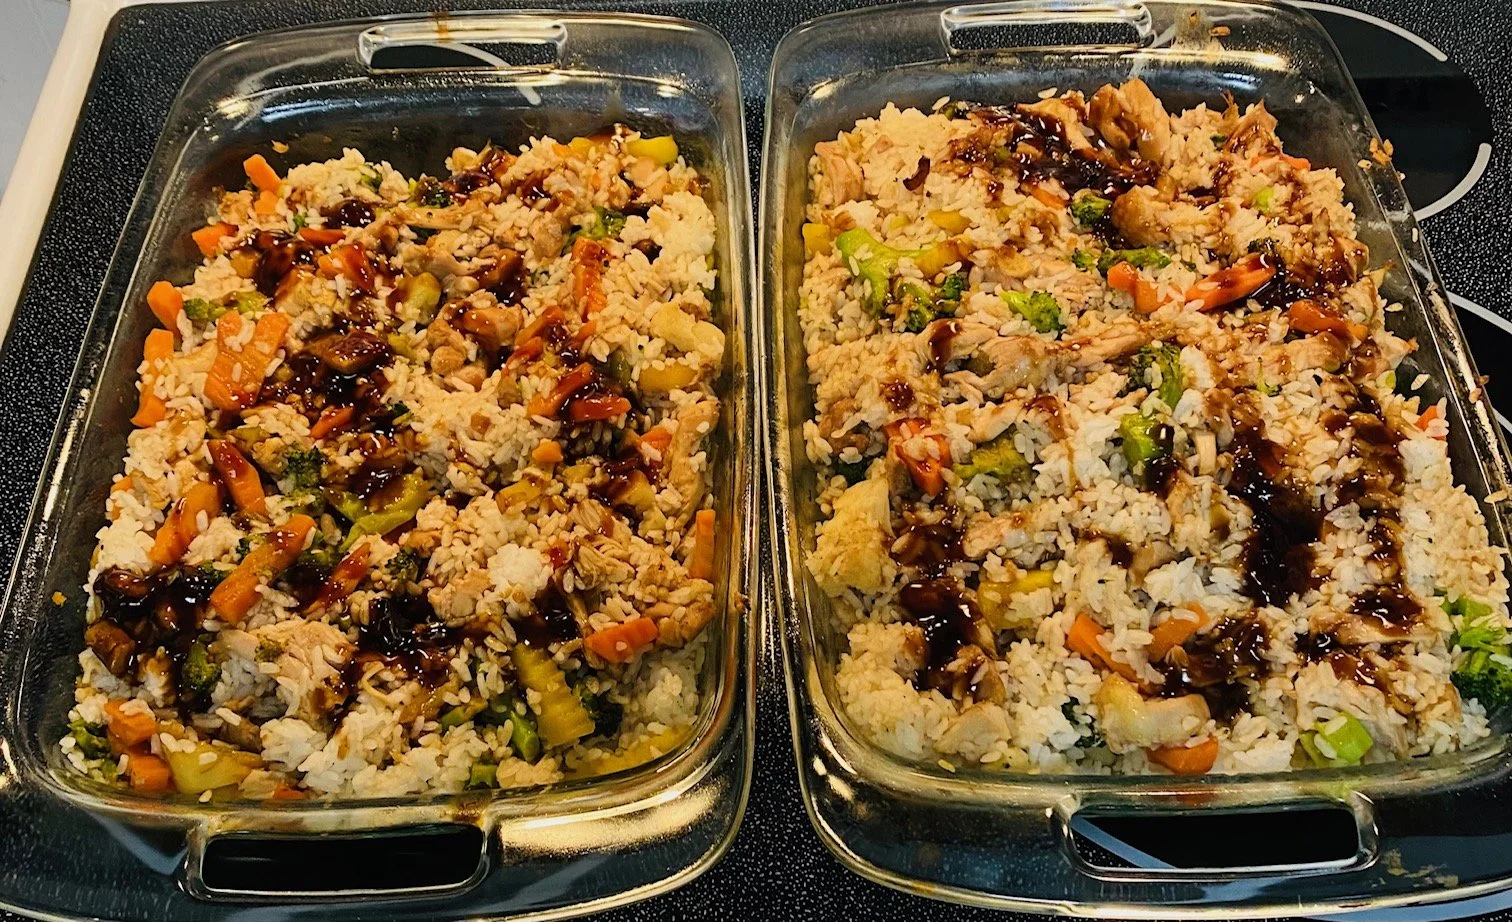
Karen’s Teriyaki Chicken Casserole Dish
Here is a quick and easy casserole for days when you are hungry and need something simple to whip up. This dish is similar to a fried rice recipe, but you don’t need to stir fry it. You can add a variety of ingredients to suit your taste and needs. Here it is!
Ingredients:
3/4 cup soy sauce (you can use the low-sodium version if you’d like it to be less salty)
1/2 water
1/4 cup brown sugar
1/2 teaspoon ginger
1/2 teaspoon garlic
2 Tablespoons cornstarch with the same amount of water
1 lb chicken breasts (skinned & deboned)
16 ounces of stir-fry vegetables of your choice
3 cups cooked rice
1/4 cup chopped green onions
1 yellow onion chopped
Directions:
Preheat the oven to 350 degrees F.
Prepare a 9x13 inch baking pan with non-stick spray.
Mix together soy sauce, 1/2 cup water, brown sugar, giner and garlic in a small saucepan.
Bring to a boil over medium heat.
Stir together the corn starch and 2 tablespoons of water in a small dish.
Add the cornstarch mixture to the saucepan and stir.
Cook until the sauce thickens and then remove from heat.
Place the chicken breasts in the baking pan.
Place the stir fry vegetables, and onions around the chicken.
Pour half of hte suace over the top of the chicken and the vegetables.
Cover with foil.
Bake for 35 minutes or until the chicken is cooked.
Remove the pan from the oven and shred the chicken into small pieces.
Add the cooked rice to the baking pan and drizzle the remaining sauce over the mixture.
Toss.
Cook for 10 additional minutes.
Remove from the oven.
Let cool.
Eat and enjoy!
Preparing For Inclement Weather At A Craft Fair
So, you’ve signed up to be a vendor at a craft fair. You made all of your crafts, you planned out your booth space, you made your checklist of things to bring. The big day is upon you. The night before the craft fair you hear a lot of rain. Then, you see lightning and hear booms of thunder. You check the weather forecast for the next day and the forecast is heavy rain, flooding, high winds, and thunder and lightning. Your craft fair booth is set to be outdoors and you need to set up a tent. Here are some things you can do:
Contact the craft fair organizer to see if the event will still take place.
If the organizer announces the event will be cancelled then be sure to find out the terms of cancellation—e.g. refunds, credit for the next event, or rescheduling of the event altogether.
If you do not hear back from the craft fair organizer you can decide for yourself not to go and risk taking a loss. This might be wise if you have crafts that are susceptible to water or wind damage. You might decide not to go to avoid getting drenched, avoid risky traffic situations, and avoid dangerous weather situations.
You can decide to show up anyway and survey the weather situation. However, if the fair is a great distance away, then that is a lot of driving and wasted time and energy if the weather is too risky to set up.
You can decide to set up no matter what and make use of your registered and paid-for booth. If you do, be sure to have a lot of towels, plastic sheet coverings, and protect your crafts as best as you can.
On the down-side, there may be a low attendance of shoppers due to the bad weather conditions. Shoppers may not want to come out and risk the hazardous weather conditions. So, even if you do set up, there may be few, if any sales.
Whatever you decide to do, be aware that inclement weather does occur and to be prepared in the event that it does happen during your scheduled fair.
Today was one of those days for me. I decided not to attend. I stayed home to play it safe. It turns out that the event did start, but was cancelled half way through. The organizers sent everyone home to be safe a couple of hours through the fair after everyone had set up. The event organizer called me to tell me that they were going to reschedule the event to the following week. I however, already had an event the next week so they will credit me for the next one that I sign up for. The organizer told me that everyone was drenched and everything was flooded. I think it was a good call to stay home. It saved me from driving out there, getting drenched, and having all of my inventory get soaked.
At a past event with a similar situation, I did decide to show up. That was in my earlier days as a crafter. The thought never occurred to me to not go to an event that I paid and signed up for. Well, I set up my tent and booth at that event. It was monsoon-like weather. The grassy area that I was set up on soon became a river at least a foot deep in running water. It was a good thing that I brought tarp. So I laid it down on the ground and it kept my feet from getting wet. It was so stormy at that event but shoppers still made their way over to my booth and I still had great sales that day. By the end of the day, everything was covered in mud. It’s a good thing that all of my crafts were put into plastic baggies so there was no water damage. Everything survived. It was good that I did show up to that event. It was not cancelled despite the severe weather. Sales were unusually great. I made it through the day without a major catastrophe.
If I were faced with inclement weather today, I’d err on the side of keeping safe. Safety should always come first.
Weigh and consider all of your options. Please stay safe everyone!
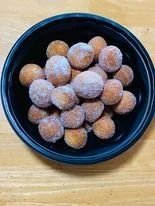
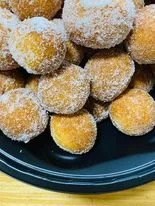
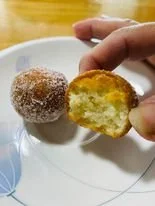
Karen’s Mochi Donut Recipe
If you ever feel like eating mochi and a donut at the same time, this delicious recipe will fulfill both cravings! It’s a recipe for a Mochi Donut. Crispy on the outside and chewy and so good on the inside covered with a layer of granulated cane sugar. This will hit the spot for a great afternoon snack. You will wish you made more! This recipe makes 30 one-inch sized donuts.
Ingredients:
2 Cups Mochiko Flour
3/4 Cup Granulated Sugar (1/2 Cup for Rolling)
1 Teaspoon Baking Powder
1/4 Teaspooon Salt
1/2 Cup Milk
3 Tablespoons Unsalted Butter (melted)
1.5 Teaspoon Vanilla Extract
1 Large Egg
Vegetable Oil (or prefered oil) for frying
Directions:
Mix the dry ingredients together. Sift the Baking Powder.
Add the milk, melted butter, vanilla extract, and egg.
Blend together by hand or with a mixer.
Heat a wok or electric deep fryer to 350 degrees F.
Form 1 inch balls by hand with the dough. Be sure to smooth out rough edges otherwise, the shape that you put into the oil will remain.
Deep fry until all sides are golden brown.
Put into a pan or bowl lined with paper towels to absorb the oil.
Let cool.
Cover with 1/2 granulated sugar.
Eat. Enjoy!
Karen’s Home Made Malasada Recipe
A Malasada is sometimes called “Portuguese fried dough.” It is a Portuguese confection. It is a fried doughnut made with yeast dough and coated with granulated sugar.
If you don’t want to go out and buy Malasadas (best eaten fresh), then here is a quick and really easy recipe. I’m not sure if this really qualifies to be called a recipe, but my family really enjoys this! Happy eating!
Ingredients:
Vegetable oil for cooking (1 quart)
1/2 Cup Granulated sugar
1/4 Cup Cinnamon (optional)
8 Refrigerated biscuits (I use Pillsbury Buttermilk Biscuits)
Directions:
Heat a wok or deep fryer to 375 degrees F
Place the refrigerated biscuits in the hot oil
Fry each side until golden brown
Remove and place in a pan lined with paper towels to absorb the oil
Let it cool
Coat the fried donuts with the sugar and/or cinnamon
Eat while fresh! Enjoy!


The Importance Of Customer Engagement At Your Craft Fair Booth
Crafters who sell at craft fairs and markets inevitably need to interact with prospective customers. Selling in person is definitely different from selling online where you don’t get to meet your customers in person. Engaging with your customers is very important. Here are my reasons why. These are my personal opinions and they may not apply to your particular situation. Hopefully, this article will give you some fresh ideas and perspectives that you can apply to your own selling.
Greeting your customers that arrive at your booth makes them feel welcomed.
Greeting a customer as they walk by often is the reason for them stopping to look at your booth. The more people that stop at your booth, the more chance for a sale.
Greeting customers with a nice smile and friendly face will make them feel like briefing and shopping.
Being preoccupied with your phone or being disengaged sends the message that you don’t care about your customers or your products.
Talking to your customers might give the impression that you are more trust-worthy. It shows a little of your personality. It shows that you have a passion for what you do and make.
I was once next to another vendor who wasn’t making any sales. He sat in the back of his booth. He told me he was a shy person. I told him to move his sign out more and to step in the front of his booth. Sure enough, he started making some sales.
When customers look at a certain product you can tell them a little about that product. This gives them more information about it. You can sell it by telling the benefits of your special product that they may not know otherwise. This will make them more likely to purchase that product.
Customers may ask a question about a product. When you provide a descriptive and passionate answer this can make them more likely to purchase from you.
Customers often ask if I have a certain type of product. If I don’t have it, I offer to make a custom piece for them to pick up at a later time. This can help you to make additional sales. If you didn’t bother to talk to them you would have lost out on that sale.
Being approachable to a customer encourages them to talk to you. Many times, they start telling me what they are looking for. Then I direct them to one or more of my products. This creates more sales.
People like to shop in person because they get to meet the maker. They get to meet you in person. Many times, I get asked if I made all of the things at my booth and I answer, “yes” and they are so amazed. I really am amazed that they are amazed. But I think it is something special to purchase something handmade from the person who made it. Interacting with your customer makes in-person shopping an authentic experience for the customer.
Meeting and interacting with you, as the maker often-times creates repeat customers. Statistics from my credit card reader company showed that 69% of the customers who paid via credit card were returning customers. This shows the importance of customer engagement. You can truly leave a lasting impression on your customers by engaging and interacting with them. Best wishes!
How To Prevent Theft At Your Craft Fair Booth: 10 Tips
So, you’re selling your crafts at craft fairs. You have prepared for your fair and have worked hard making each craft item to be sold. You believe that all potential customers come to your booth to shop. The reality is, thieves exist to rob you of your hard earned crafts. Theft can eat away at your profits. Just today, selling at a vendor pop up, I discovered a missing earring on a rack that I didn’t sell. It was stolen. It can happen to any vendor. Here are ten tips that I hope are helpful in preventing future theft at your craft fair booth. These tips are not exhaustive and you can probably think of other ones, but I hope something can be gleaned from them.
10 Tips To Help Prevent Theft At Your Craft Fair Booth:
Set up your display so that you have a clear view of all items and make sure that there are no blind spots for thieves to hide behind.
Greet each customer as they come to your booth. This signifies to them that you are aware of their presence and that you are keeping an eye on them.
Keep your money on you by using a money belt, Fanny belt, apron, or the like. This prevents thieves from snatching your cash box when no one is looking, I participated at a market and learned that at the end of the day when everyone was cleaning up, a vendor had his cash box stolen as he turned his back for a second to put things away. This could have been avoided if he kept his cash in him.
Keep small and easy-to-steal items right in front of you so that you can monitor when customers are looking at them.
Keep costly items locked up. I have a locked glass display case to display my most expensive pieces. Customers can ask to see something while you are watching them. This display case is also locked to the table so that no one can run away with it.
You can have a rule to limit the number of people looking at your booth at once to minimize theft in the crowds.
Employ the help of an extra pair of eyes to keep watch if you know the fair will be busy.
Use mirrors to help keep watch on customers.
Have your booth well organized so that you can easily see if something is missing. A booth in disarray is an invitation for thieves.
Have items at an arm’s reach away so that customers will have to extend an arm to see something making it obvious that they are handling an item.
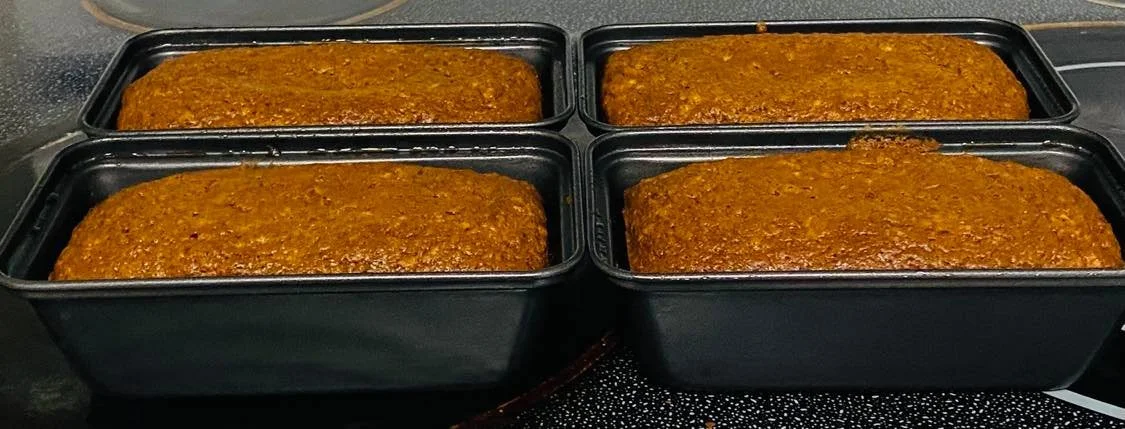
Karen’s Banana Bread Recipe
Here is my delicious Banana Bread Recipe that is moist and delicious! Hope you enjoy it. It is a favorite of my family!
Ingredients:
1/2 Vegetable Oil
1 Cup Sugar
2 Large Eggs
1 1/4 Cup Flour
1 Teaspoon Baking Soda
1/2 Teaspoon Salt
1 Cup Mashed Bananas
Directions:
Preheat the oven to 350 degrees F.
Grease a large loaf pan.
Mix oil and sugar together.
Add eggs, one at a time, beating well after each addition.
Sift in flour, baking soda, and salt.
Add bananas to the mixture.
Spoon into prepared pan.
Bake for 45 minutes (baking time may vary, bake until center is cooked).
Enjoy!
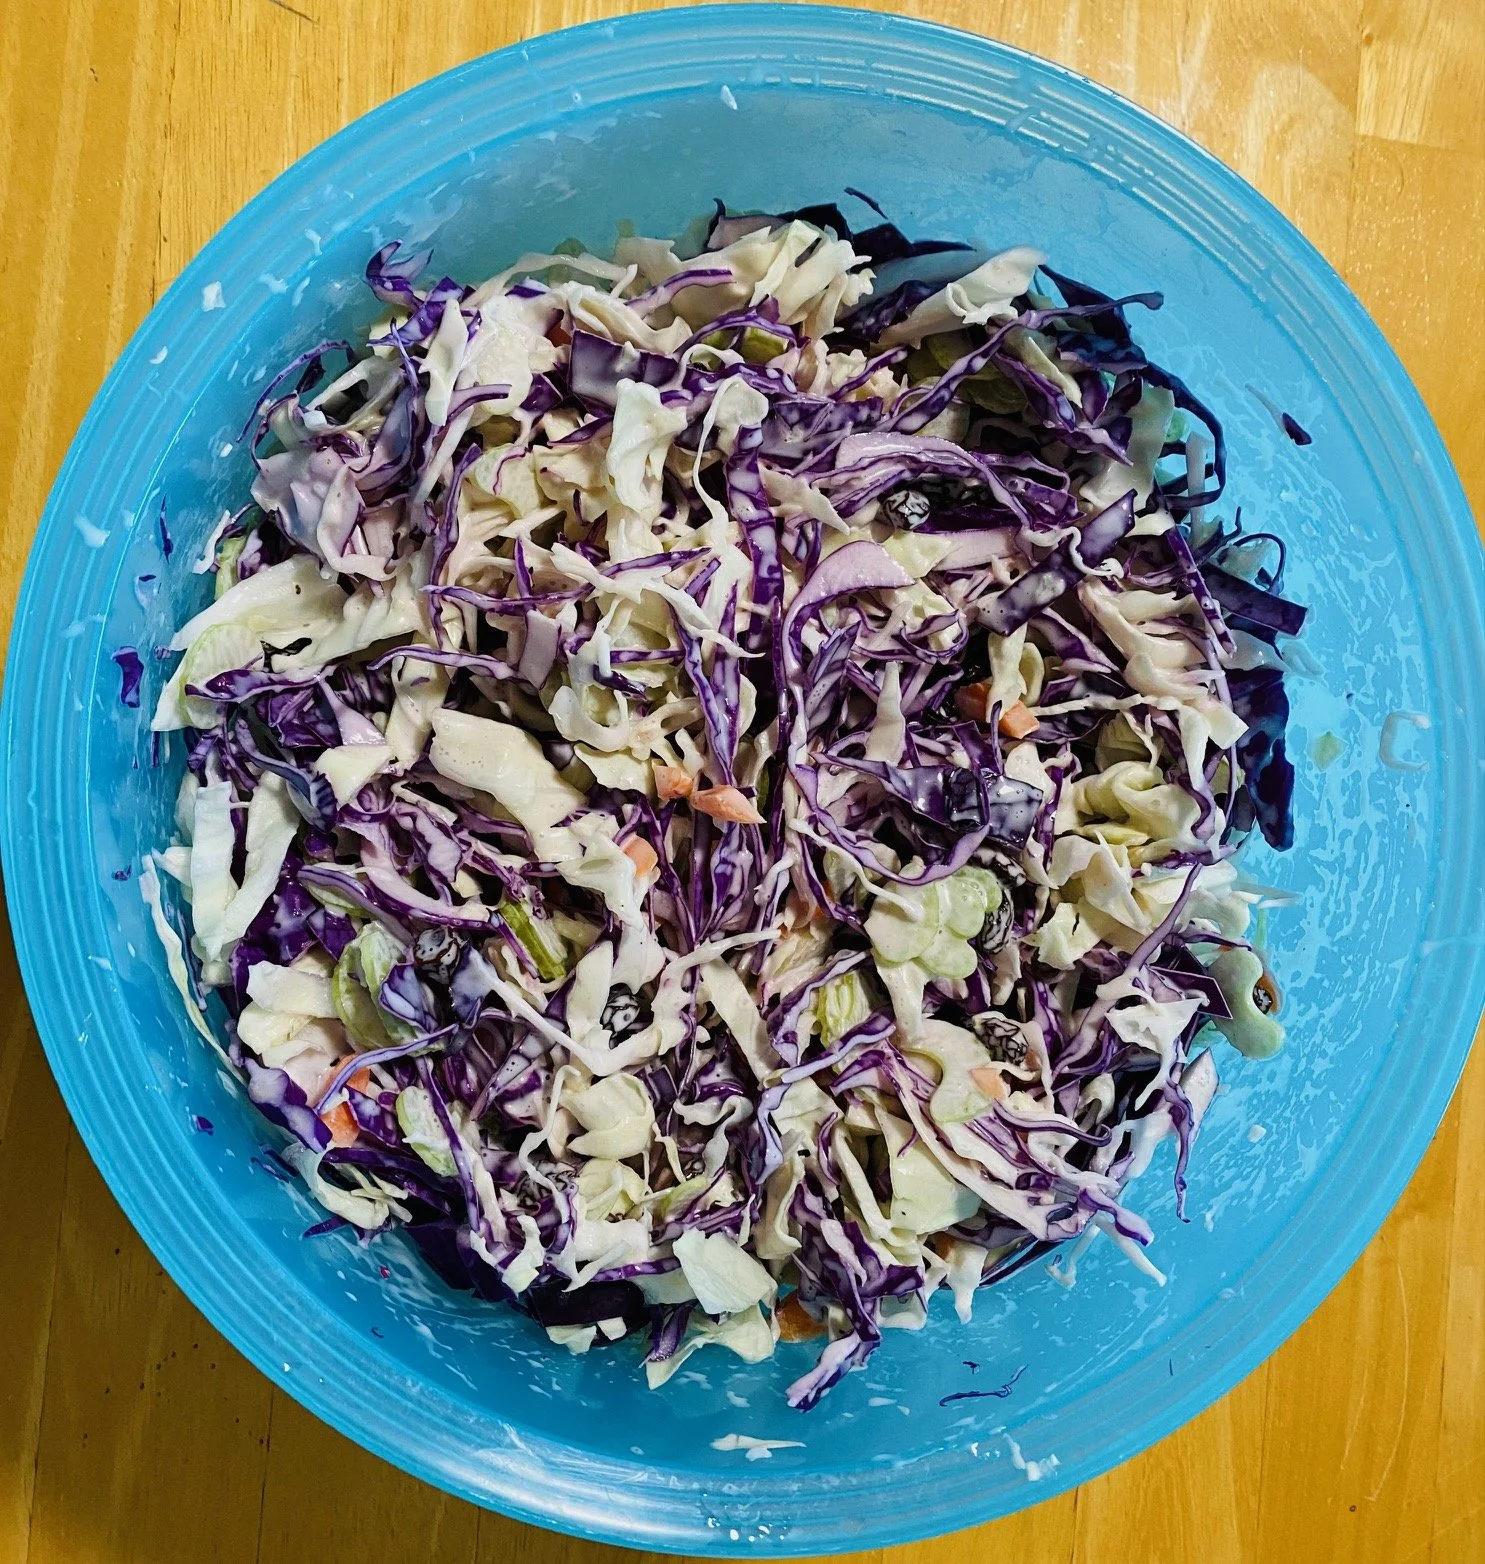
Karen’s Coleslaw Salad Recipe
If you’re looking for a healthy quick and easy salad, this is it. My family asks for this time and time again. There are many potential health benefits from eating cabbage as well. To name a few, it has the potential to make your heart healthy, it’s packed with nutrients including vitamin K, it could lower cholesterol, it could help to improve your digestion and also lower your blood pressure. So why not give this recipe a try? Here it is!
Ingredients:
4 Cups total combination of sliced cabbage, purple cabbage, celery, carrots, and raisins.
1/2 Cup Mayonaise
1 Tablespoon Vinegar
1 Tablespoon Milk
1 Tablespoon Sugar
Dash of Pepper
Dash of Paprika
Directions:
Put cabbage mixture into a large salad bowl.
Mix together the rest of the ingredients.
Pour over the cabbage mixture in the salad bowl.
Mix thoroughly.
Eat and enjoy!
Five Benefits Of Participating In A Weekly Or Monthly Craft Fair Or Market
If you are a crafter looking to be a vendor at a craft fair or market, then it might be best to find a venue that occurs on a regular basis for example, weekly, monthly, or even yearly. This is my own perspective and opinion and these things may not apply to your unique situation.
Here are 5 benefits of participating in a weekly, monthly, or even yearly craft fair or market:
These events have a built in and regular following of customers. People are loyal to these events and they will come out to support it. I remember after Covid shut down all of the craft fairs, things started to open up again. I signed up for one of the fairs that usually took place every year except for the previous Covid year where it was held virtually, online. I didn’t know what to expect. When I arrived, there were very few vendors. The place looked deserted. But I remember that right at 8:30 a.m. when it was supposed to start, people started to arrive like clock work. They came steadily in droves to support the event and it was a great craft fair. The fair had its regular following of customers.
People, customers, vendors know what to expect because it has occurred before. A good venue will continue to have good vendors and thus good customers.
Customers will know where to find you and know that you will be there. I participate in a couple of weekly markets and customers return there to shop from you. You will get repeat customers. My stats for 2022 from my credit card processing company revealed that I had 31% new customers last year. That means that 69% were repeat customers. That is pretty amazing. I’m so thankful for my loyal customers!
You, as a vendor will be familiar with the venue set up. This will allow you to plan ahead and know how to best set up your booth and how to unload and load and all of the rules of the event. It makes it that much easier to be a vendor there.
You will get to know other vendors there. Good or bad, most vendors are really nice people and they can be really helpful in times of need. At my weekly markets I often get free food, free merchandise or discounted merchandise from the vendors that I know there. Knowing the other vendors has its perks.
So, if you are planning to participate in craft fairs or markets, you might want to try out a regularly occurring venue. It could be to your advantage. Best wishes!
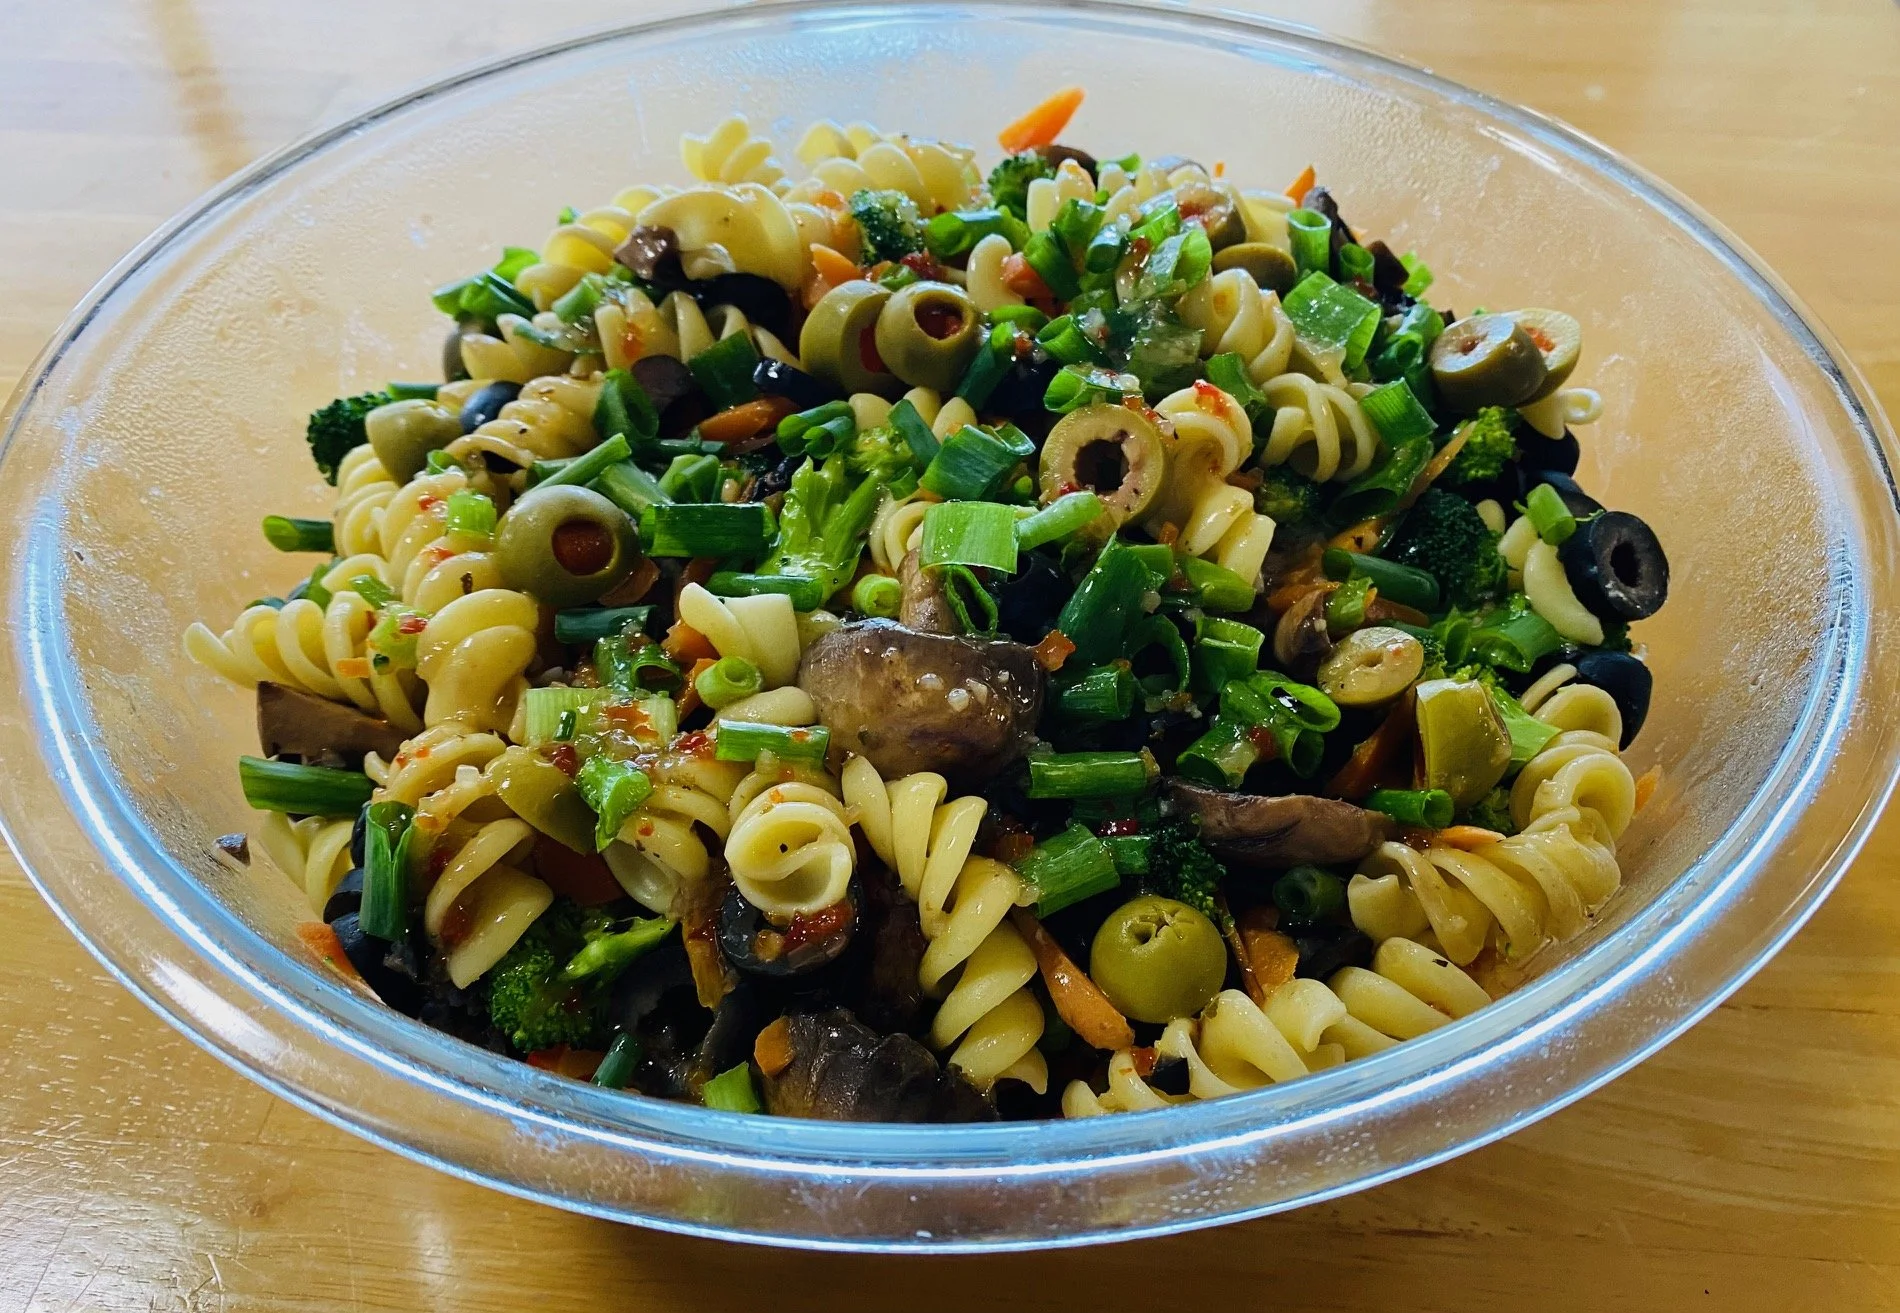
Karen’s Rotelle Pasta Salad Recipe
Notification: This post contains affiliate links. If you use these links to buy something, we may earn a commission. There is no extra cost to you.
Here is a quick and refreshing pasta salad recipe. It can be used as a side dish or even as a light meal in itself. It is quick and easy and my family loves it! You can easily substitute or add any of your favorite ingredients as well.
Ingredients:
16 oz. Rotelle Macaroni
1 Cup Broccoli
1 Cup Sliced Carrots
1 Cup Fresh Mushrooms (sliced into quarters)
2 T Butter
1 Cup Sliced Black Olives
1/4 Cup Chopped Green Onions
1/4 Cup Chopped Pimientos
1/2 Cup Italian Salad Dressing
Directions:
Cook the macaroni according to the package directions. Drain and set aside. Blanch the broccoli and carrots. I use this steamer because I like to steam in the microwave: https://amzn.to/3k4dGwK (click on the link). Saute the mushrooms in butter. Combine the macaroni and the vegetables in a large serving bowl. Here are my favorite serving bowls: https://amzn.to/3Iy9H5P (click on the link). Add the dressing and toss to coat. Chill. Eat and enjoy.
How To Get Juice From Lilikoi Fruit
Notification: This post contains affiliate links. If you use these links to buy something, we may earn a commission. There is no extra cost to you.
Here in Hawaii Lilikoi is a popular and delicious fruit. Lilikoi or Passionfruit or Passiflora edulis (Latin) is a purple or yellow fruit filled with seeds and pulp. Passion fruit vines first came to Hawaii from Australia in the 1800s and originated from Brazil. When you cut open the fruit they are filled with little sacs containing pulpy juice as well as many black seeds. You can eat the fruit raw, but you can also make many savory dishes from the juice of the fruit. This article explains how I take out the juice from the fruit to make many dishes—Lilikoi Butter, Passion Fruit Jelly, Lilikoi Mochi, Passion Fruit Juice and more. I will post those recipes here. If you are unfamiliar with the fruit or even how to get the juice from the fruit, I’ll explain it here. You may have other methods or better methods, but that’s okay. Here is my way explained and I hope you find it to be useful.
Collect all of your fruit. Purple, yellow, it doesn’t matter. The fruit is still good even though it looks all shriveled and dry on the outside. These types are even sweeter! Don’t throw these out. The juice can be mixed together. I find that the purple variety has more pulp once cut open than the yellow variety. Wash the outside of the fruit if you’d like and then cut the fruit open in half. The outside shell of the fruit is tough and hard. Once you cut the fruit open in half, scoop out the pulp—the seeds and all and put it into a container. Continue cutting each fruit in half and scooping out the pulp collecting it into a container. I throw away the outside part of the fruit, but you may find other uses for it. Once you are finished cutting open all of the fruit and scooping it out into a container then next you will need to strain out the seeds from the rest of the pulp.
I used to put them into a collander and try to mix out the pulp from the seeds. That was until a friend introduced me to this great milk nut bag (thanks Rucci!). Here is the link to purchase that great milk nut bag. It can even be washed in the dishwasher and used over and over again. https://amzn.to/3QrkXmh (Click on the link.) Using the milk nut bag, pour some of the pulp, a little at a time into the bag and then squeeze the bag into another container to collect the juice from the fruit. Continue this way until you have squeezed out every last drop of the juice. You can dispose of the seeds or find another use for them.
Wella, now you have Lilikoi Juice that you can make into many different dishes and treats! Enjoy!

Lilikoi Fruit

Lilikoi Fruit Cut In Half

Lilikoi Pulp With The Seeds

Squeeze out the juice using the milk nut bag.

Lilikoi juice without the seeds.
5 Benefits Of Making Home Cooked Meals
In this day and age of fast foods, fast stop stores, instant communication, online ordering, and just about anything you could imagine available at just a click away, making a home cooked meal seems to be a polar opposite. But there are many benefits to making your own home-cooked meals. These benefits are my own personal opinions and they may not apply to your own personal situation and you may even disagree with me. But that’s okay. Perhaps this article will give you a few new ideas and perspectives.
Here are 5 benefits of making your own home cooked meals:
Home cooked meals are often less expensive than take out foods. You can choose your ingredients to purchase and you can purchase them on sale. You don’t have to pay the middle man when you have fast food delivered to your door.
When you cook your own meals, the ingredients are often healthier. You can choose ingredients that are not highly processed or unhealthy. This can make you a healthier person.
You may eat fewer calories than take out meals if you cook at home. Take out foods may be high in processed fat and calories than if you cook your own meals. Choosing healthy ingredients can result in eating fewer calories.
You can socialize more with your family and loved ones by cooking at home. Cooking can be a leisurely activity where family members can stand around conversing as the food is being prepared and cooked and eaten as well. Grilling food in your backyard is an example of leisurely cooking and can be a prime time to socialize.
Cooking can stimulate creativity and higher level thinking skills. You will need to read directions if cooking from a recipe and also taste and tweak the seasoning as you go along.
Cooking at home may be a lost art these days but can hopefully be revived during times when you may not be as busy. Taking some time to cook a great meal at home can lead to self satisfaction and give you time to spend with family and loved ones. Who couldn’t use more of that? Best wishes!
Getting Started With Branding
Now that you’ve decided to make and sell your crafts, it is a good idea to get started with branding. This article represents my own personal opinions that may not necessarily apply to your unique situation or preference. Hopefully, this article gives you some new ideas and perspectives.
Branding is a visual representation of your company. You’ll need to decide on a company name and then create a logo to represent your business. Check the website of your state business filing agency to see if that name is taken. If not, you can probably use your chosen name for your business. There are online websites that you can purchase a domain name to use for your online website. This ensures that no one else is using that business name. Always check the business laws and requirements for your state before proceeding.
Once you have found your business name you can create a logo that best represents your craft company. From there you can print out business cards, and other custom products for your company. I printed out a banner for my tent to display with the name of the company and my website address. I also had a custom table cloth made with my company logo and name. Some craft venues will require you to have a professionally-produced sign to display at the event. I even had custom polo shirts made with my company name on it. You can create other products as well such as branded tote bags, branded face masks, branded jewelry cards, and more.
Having branded material and products makes your company appear more professional and trust-worthy to your customers. They will also know how to contact you in the future and you can have repeat customers. This helps you to build your customer base. Loyal customers will come back to purchase from you multiple times throughout the years. Loyal customers also tend to refer their friends and family to your business and this is one way that your business can grow. Branding helps you to build confidence in your business. It creates consistency in your brand and marketing. Branding gives your business credibility. Branding helps to give your business an identity. It gives the customer reassurance in your products. Most importantly, strong branding results in financial payoff. I hope this article has provided some new insights and food for thought as you embark on your exciting journey to create a profitable craft business. Best wishes!
10 Low-Risk Ways To Get Started Selling Your Crafts
So now you have decided to turn your hobby into a money-making endeavor. You have weighed the costs, your time, and other factors into your decision and you have decided to give it a go. This article will offer 10 low-risk ways to get started selling your crafts. These are my own personal tips based on my own experiences and these may not be right for you or your situation. In fact, these tips may turn out to be not so low-risk at all for you depending upon your own needs and personal situation. Hopefully, by reading this article you may walk away gaining new perspectives and ideas.
When first starting out selling your crafts, you may not want to start off selling at a high-risk event. A high-risk event is one that has high fees, strict requirements, perhaps a large up-front deposit amount, and more that leave you wondering if you might even sell a single thing there. Of course, you should research the events that you do sign up for well ahead of time. You should find out how many people are typically in attendance, how well other vendors have done in the past there, and the specific demographics of the shoppers. If you have never participated in any craft fair previously, this information may not be all that useful to you because you are still uncertain if your product will sell-at all.
Here are 10 low-risk ways to get started selling your crafts if you are just getting started. Low-risk means that there is a nominal fee to participate as a vendor, few participation rules, no up-front deposit amount, and requires minimal effort on your part. While these suggestions might not yield huge sales due to the nature of the event, it is a way to get started that is not intimidating and you won’t have to put down a huge amount of money in order to sell your crafts. Some of the suggestions I have here are specific to Hawaii because that is the state I reside in, but you may be able to apply it to a similar venue in the place that you live. Here are my 10 tips:
Post and sell your crafts on social media. Take good pictures of your items and include prices and invite people to contact you if they are interested.
Have a garage/craft sale at your own residence. Combining garage sale type of things along with your crafts to sell reduces the total amount of crafts that you need to have made. You can even combine this sale with your neighbors or friends.
Sell at your community association events. My neighborhood association holds a monthly garage/plant sale at the neighborhood recreation center for members. The association also holds a monthly craft/food sale for the community for a nominal fee. It is a small and cozy event and you can meet and connect with your community.
Sell at the local swap meet. On Oahu, there is a swap meet held at the Aloha Stadium on Wednesday’s and Sundays the cost is low and the event attracts locals as well as tourists so there is a good crowd.
Booth share at a local, inexpensive craft fair with another vendor or vendors. This will reduce the cost of the event as well as give you company and moral support as you venture out selling your crafts for the first time.
Sell your crafts on consignment at a local craft store. Here in Hawaii, we have the Ben Franklin Craft Stores through out the state. They have locker spaces, glass cubicles that lock where crafters can rent and sell their crafts. The locker space is approximately 17x17 inches and you can basically set up your own little storefront there. Customers who visit the store can browse the lockers and if they see something that they’d like to purchase can tell a store clerk to open it up and they pay for it at the register. The crafter then receives a monthly check for the merchandise that has sold. The crafter only pays the monthly fee for the locker space. The cost to rent a locker ranges from $40-$60 depending on the location. Eye-level lockers are premium and cost the most. The ground level lockers are the least expensive. Several stores allow locker space vendors to set up a table outside of the store and sell their crafts via a vendor trunk show. This used to be free, but now costs a very nominal amount. Vendors can do very well selling at the trunk shows and also selling out if the rented lockers.
Sell at a weekly Farmer’s market. While Farmer’s markets are generally for selling food, produce, prepared meals, baked goods, and plants, I have also sold my crafts and have done very well. The cost of participating at weekly farmers markets is generally lower than the cost of high-end craft fairs.
Sell on social media marketplace or online yard sales. This is a no-cost way of selling your crafts to see if anyone may be interested.
Find a low-cost craft fair or fundraiser event. I participated in a local club fundraiser Bingo night event that cost $25 and there were only 6 vendors there. Though it seemed like a no-sales event, I made killer sales. Seek these out.
Sell at a local school or church fundraiser craft fair. These are typically low cost and smaller venues. This is how I first got started. You can too. Find out these venues by inquiring with other vendors and visiting these venues in person and you will soon get more leads as to where you can sell your crafts.
I wish you the best success in your craft sales. Follow your passion and your dreams!

Here is one of my Ben Franklin Locker Spaces!

Here, I am selling my crafts at a Ben Franklin Vendor Trunk Show outside of the store!