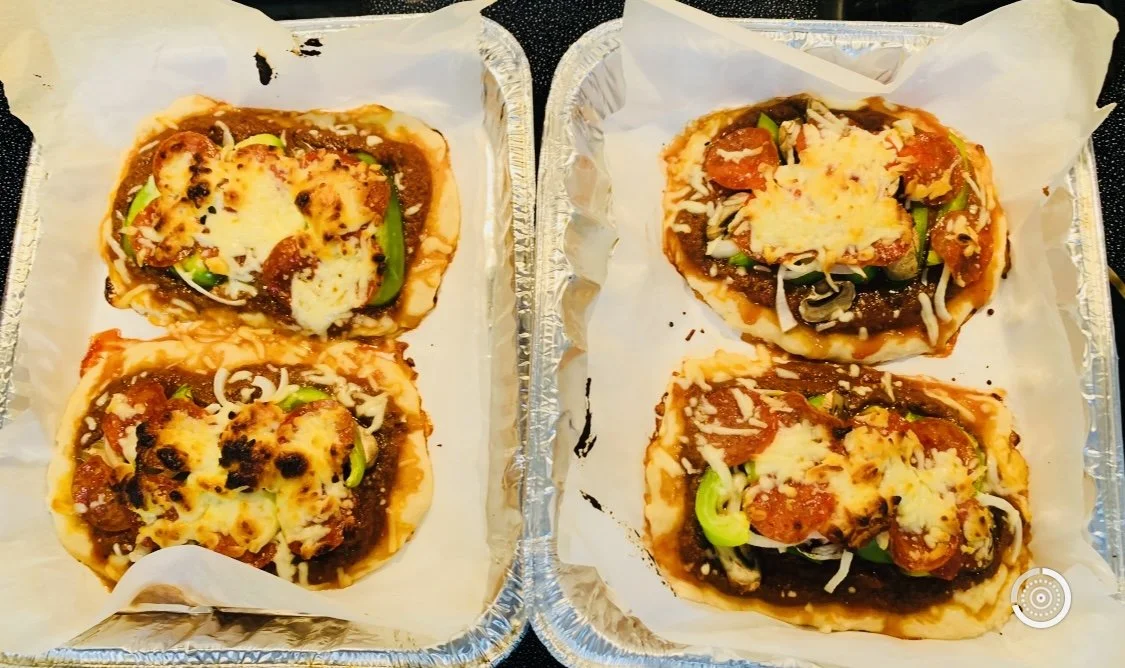
Karen’s Homemade Pizza Recipe
Notification: This post contains affiliate links. If you use these links to buy something, we may earn a commission. There is no extra cost to you.
Here is a quick and very delicious homemade pizza recipe. There is nothing more tasty than a homemade pizza sauce. You can customize this recipe to put your own choice of toppings. The possibilities are endless. Enjoy!
Pizza Crust Ingredients:
2/3 cup flour
1/2 teaspoon baking powder
1/4 teaspoon salt
1/4 teaspoon sugar
1/4 cup water
1 Tablespoon cooking oil of choice
Pizza Sauce Ingredients:
Can of tomato sauce (15 ounce)
2 teaspoons oregano
1 teaspoon thyme
1 teaspoon basil
1 teaspoon garlic powder
1 teaspoon onion powder
2 teaspoons sugar
1/4 teaspoon salt
Pepper (dash)
Toppings: You can put anything on it
Shredded mozzarella cheese (4 oz)
Pepperoni (4 oz)
Chopped onions (1 ounce)
Directions:
Mix together all of the ingredients for the pizza crust. Divide dough into 4 balls. Roll the dough into desired shape. Put onto a baking sheet. I like to line the baking sheets with parchment paper so it doesn’t stick and also to make it easy to transport to another container or plate. Here is the parchment paper I like to use: https://amzn.to/3GdfISr (click on the link). These are my favorite baking sheets. I like them because they are aluminum making them durable and I can use them for many baking purposes. I also prefer aluminum over nonstick type of surfaces which can peel off or chip over time. https://amzn.to/3Cl9GOL (Click on the link).
Mix together the ingredients for the pizza sauce. Put the sauce onto the pizza dough. Spread.
Add your toppings onto the pizzas.
Preheat the oven to 425 degrees F. Bake for 12 minutes. Let cool. Eat!

Karen’s Creamy Chicken With Biscuits Recipe
Disclaimer: This post contains affiliate links. If you use these links to buy something, we may earn a commission. There is no extra cost to you.
This recipe is quick and easy and is a favorite with my family. It is a delicious casserole that you will surely enjoy!
Ingredients:
2 cans 10.75 ounces condensed cream of chicken soup
1/2 cup milk
1.5 cup shredded Cheddar cheese
1/2 teaspoon ground black pepper
32 ounces combination of blanched broccoli, cauliflower, carrots
9 ounces canned chunk chicken breast in water, drained
15 refrigerated biscuits
Directions:
Heat the oven to 400 degrees F.
Combine the soup, milk, cheese, and black pepper in a 3 quart Pyrex baking dish. Here is my favorite baking dish: https://amzn.to/3IkgUX2 (click on the link).
Stir in the vegetables and chicken.
Bake for 15 minutes. Stir.
Top the chicken mixture with the biscuits. Bake for 15 more minutes.
Remove from the oven.
Let it cool. Enjoy!


Things To Do After The Christmas Season Rush
If you’re a crafter and a maker, you’ve probably just made it through the Christmas season rush. Sales were booming and you had barely enough time to make and ship all of your online orders. Stock was running low for your craft fairs and there was no time to rest. Now that it’s January, all of that is past and you are probably wondering what to do when things are not as busy. Here are some tips on things you can do right now after the Christmas Season rush. These are just my own personal opinions and they may not apply to your unique situation. These tips are things that I would do after the Christmas Season rush and they are not all-inclusive.
Rest, take a breather and take time to refresh for the new year. Creativity requires a rested mind.
Clear out and organize your craft supplies so that you can find things when times get busy. Take inventory of what you have so that when you need something you don’t rush out to purchase something only to find out that you already have it.
Make new crafts for the new year and try out new designs.
Learn a new skill to further improve upon and develop your levels of expertise.
Take a vacation, spend time with your family and friends that may have been neglected during the busy season.
Work on developing your website and update inventory, remove any old inventory that isn’t selling, add new designs. Update prices that may need to be increased due to inflation.
Make new crafts to replenish and restock what is running and and sold out.
Work on your email list of customers and reach out via email campaigns or newsletters to inform them of any sales you may be running and where they can find you at your next upcoming events.
Take time to wash, clean, repaint any craft fair displays to keep them looking sharp and at their best.
Take time to exercise, meditate or pray to take care of yourself. Eat healthy.
Read a new book to learn a new skill or to gain new knowledge to constantly improve yourself.
Network with other crafters.
Plan out your next vendor events and register.
Find new vendor events and take the time to check them out in advance and attend them in person before deciding if it is a venue you may be interested in.
Take time to enjoy life! Practice gratitude. Be thankful for little things.
Happy New Year 2023! Best wishes!
Should You Sign Up For Craft Shows Year ‘Round?
The Christmas season craft fairs have come and gone. For many, this is the busiest and often times most profitable season of the year. The hustle and bustle of the season has diminished. For many a crafter, the question remains—is it worth it to sign up for craft fairs year ‘round and during months where sales and crowds may not be as much? There is no one right answer and obviously it will depend upon your particular situation, the place that you live in, and your own personal choices. Each person will have to decide for his or her self what to do. Following are some points to ponder as you decide the course of the next few months and new year in terms of venues that you may or may not want to participate in. These are my personal insights and they may or may not apply to you or your situation. Hopefully, there may be something you can glean from these.
The price of everything has been going up due to inflation—the cost of goods, materials, supplies, gas, and no doubt, the cost of markets and craft fairs for vendors. Some craft fairs here in Hawaii can cost upwards of $250 to $800. If you believe that you can recoup the cost of the fee plus your time, then it might be worth it. Every venue has its following and if the venue has traditionally brought in a lot of people and sales, then it might be worth a shot. If not, it might be worth looking into a less expensive venue when shoppers and sales are far and few between. Check if the event organizer does a lot of advertising and if there is a special holiday centered around it—e.g. Valentine’s Day, etc.
Don’t judge a book by its cover! Less expensive and less glamorous events don’t necessarily dictate the outcome. I once participated as a vendor at a Bingo Night fundraiser for an organization. The event cost $25 to participate as a vendor. When I arrived, there were only 6 of us vendors there. I really didn’t expect much. I wondered if I would even make back my vendor fee. As the night went on, my expectations seemed to be coming true. No one was shopping and I wondered why I was even there. Then, a turn of events! There was a break in the Bingo game! People went to get food and started shopping at the vendor booths. First a few people came up, then more and more and more. It got really busy! I started to run out of change! I had to call my son to come and bring more change. My customers had to get change. The Bingo game resumed but more and more people kept coming to shop. It was a miraculous night! I will never forget it. So, lesson to be learned, don’t judge a book by its cover. In the way of craft fairs, you can never tell the outcome of an event.
Participating in craft fairs year ‘round can be a gamble. I participate in weekly markets and these tend to have regular customers and shoppers. Weekly and even monthly events is a good way to build up clientele. You will obtain regular customers. This is a benefit of participating as a vendor all year.
Participating in fairs and markets all year is another way to be able to rest out your latest and newest products. This is how I find out what sells and what doesn’t. Customer feedback is very valuable. You learn all year what your successful products are and then come the busy season—boom! You produce all of your top sellers! You are thus, setting yourself up for success. This is another benefit.
Participating as a vendor all year enables you to network with other sellers. You find out about other markets and opportunities and this allows you to grow. I have people asking me how they can get started selling at fairs and markets. You just have to find one and try it. Visit different venues first as a shopper and see if it is something you’d like to do.
Every month has its good points in terms of selling. January is a good time to have sales to clear out old stock and make room for the new. You can also gear up for Chinese New Year. February has Valentine’s Day and President’s Day. March gears up for Easter and St. Patrick’s Day. April is spring and Easter. May is Mother’s Day and graduation season. Wedding season can run through June and July or all year long. To me, August and September can be the slowest sales months, but it really varies from venue to venue. Of course, October-December is the holiday shopping season.
To conclude, decide which events will be worth your time and vendor fees before signing up. Talk to other vendors who have participated in those events before and then decide for yourself. People always love to shop and there is something special about buying handmade directly from the crafter who made it. I feel that this will never go out of style. Opportunities can abound year ‘round. Find the best events that suit you. Best wishes for this new year!
Should You Sell Your Crafts?
Should you sell your crafts? Maybe you are an avid crafter who loves making things in your spare time, but it is just a hobby. You may wonder if you should sell your crafts. Here, I will give you food for thought. This is just my personal opinion. It may not be right for you. There are many viewpoints and pros and cons to selling your crafts. Ultimately, you will need to decide for yourself if selling your crafts is right for you.
Points to ponder:
If the thought of selling your crafts has never crossed your mind, then you are probably content making your crafts for your own personal hobby and past time. Making crafts is what you enjoy doing and there is no need to make it any more complex than that.
If the thought of selling your crafts will detract from the simple joys you have in crafting, then selling your crafts is probably not right for you. In this scenario, selling your crafts will be a chore and make crafting more like work or a job.
If you are reading this article, then maybe the thought of selling your crafts has crossed your mind. You may be at the stage where you wonder if you could make a little money with the crafts that you make. You wonder if your crafts might even sell. Selling your crafts might help to support your crafting hobby. But you don’t know where to even start.
I crafted for years since I was a little girl. I learned to crochet in the 4th grade at the YWCA. I learned to sew in the 8th grade. Since then, I enjoyed making gifts for my family and friends and even made my own clothing to wear. Sewing and crocheting was economical because back then, yarn and fabric was relatively inexpensive. The thought never crossed my mind to sell any of my crafts. It was just something I did as a hobby.
So when did I start selling my crafts? Or even begin thinking about it? Years later, something called social media appeared. I started posting my crafts for others to see. Lo and behold, people wanted to purchase what I was making. Then, I began making things and people were paying money for it. I had orders. I began making more and more things. Then, my children’s school was having a winter craft fair fundraiser. I decided to sign up as a vendor. I didn’t know what to expect or even if any of my stuff would sell. Thoughts crossed my mind—would I be able to make enough things to sell? Well, the craft fair day came. Long story short, it was a huge success! Next, I searched for online places to sell my crafts. I found this website called Etsy and researched about it. It was relatively easy to start up my own Etsy Shop! Oh boy! I opened shop back in 2014 with meager listings. A year went by, and I had not a single sale. Then, the next year, I was determined to build up my Etsy Shop. I learned about something called SEO. Then I learned how to use it to my advantage. Within a few months, I had my first sale! I was ecstatic! That first sale led to more sales, and more sales, and more sales! Today, I have made over 11,000 sales and am a repeat Star Seller! Www.GiftsByKarenM.Etsy.Com has become highly successful! I don’t take any credit for my success though. I am thankful to my loyal customers, family and friends for their support, and to my awesome God and Jesus, my Lord and Savior for the many blessings bestowed on my life.
So, should you sell your crafts? If you are interested, first see if you can make your crafts as gifts. See if people genuinely like your crafts. See if any friends or family might purchase your crafts as gifts. Start off small. Sign up for a relatively small craft fair. Don’t go all out making 1000s of crafts (and ultimately spending a lot of money) until you can see if your few crafts sell. Build little by little. If at first your crafts don’t sell, don’t give up. Get feedback from people. Feedback helps you to tweak your designs. What you enjoy making and think is nice is not always what others like. Different venues and clientele also vary in craft likes and dislikes. Find out your strengths and weaknesses. Give selling your crafts a try.
If all else fails, and you are unable to sell your crafts, then stick to it as a hobby! You will still enjoy it and there are many benefits of crafting—to name a few—stress relief, positive self esteem in creating something, it keeps your brain active, develops finger and fine motor dexterity, and it develops your creativity, a higher order thinking skill that uses more of your brain.
I hope this article gives you some insight and that it helped a little. Thanks for reading!
Preparing For An Outdoor Craft Fair Event
Disclaimer: This post contains affiliate links. If you use these links to buy something we may earn a commission. Thanks.
As a crafter, you might inevitably be participating in an outdoor craft fair. If you have never been a vendor at an outdoor event, you might wonder what you will need to have and do to make the event as successful as possible. Here, I will share some of my insights and tips to help make your event as successful as possible. These tips are not all inclusive and some may not apply to your particular situation. These are tips that have been useful in my experiences at outdoor events.
Tips:
Find out if you will need a tent or covering and the specific requirements. Some events will require you to have a white or branded tent. Some will require that the tent have straight legs. Then make sure you have the specific tent or covering required and purchase well in advance of the event. Some venues will allow you to rent a tent. It might be worth renting a tent if you will not be doing many events that require a tent. Renting a tent is also beneficial if you do not have the help to set up a tent by yourself. My favorite tent is a pop up tent that you can pretty much set up by yourself. You pull the tent legs apart and then go underneath and there is a pop up button in the middle of the tent that you push up and it sets the whole tent in place without having to go around and click each side in place. Here is a link for my favorite 10x10 straight legged tent: https://amzn.to/3GcJUNP (See the link button below). In times when I need a smaller, more manageable tent (8x8 with 6x6 top), I love the portability of this smaller tent, especially during high winds. It doesn’t take that much weight to weigh it down and when the winds are strong, I can manage this tent by myself. It is also a pop up style tent with the button to push up in the middle for easy set up: https://amzn.to/3Gzs8We (click on this link). I also have a straight legged 8x8 tent for times when I need something more portable and more manageable but with a little more substantial coverage than the previously mentioned smaller tent. Here is my third favorite tent for these purposes: https://amzn.to/3VG0JX5 (click on this link). The cost of tents can be pricey, but I love my tents. If you click on the links, sometimes you will see other options to purchase a used but good or like new same model tent. I go through a lot of tents, so I often times purchase a used one that proves to be like new and just as good for a fraction of the price of a new one. Just a word, tents can a do break. I was at a windy event last month where the wind would pick up with great gusts all of a sudden. I had 50 pound blocks sitting on each tent leg, so I thought I was good to go. However, with the shaking winds, the wind shook the block off of the foot of the tent and so the weight was not holding down the tent and the tent blew over, breaking the tent. Needless to say, always tie the weight to the tent instead of resting the weight on the tent foot. It can shake off!
Find out the specific tent weight requirements if a tent is required. Some venues will not allow you to drive stakes into the ground. Some specify a certain weight for each tent leg. Obtain the necessary weights well in advance of the event. I purchased cement blocks here locally. There is a company called EZ Corners located in Waipahu, Hawaii that custom makes these blocks specifically for tents. I have even seen them paint the company logo onto the blocks! For my smaller tents, I use sandbag weights and these are very sufficient to hold down the tent. Here are my favorite sandbag weights: https://amzn.to/3VF2fII (click on this link). I love the look of these sandbag weights (they don’t come with the sand)—they are sleek and attractive looking and don’t detract from the tent.
Be sure to plan your space set up at home or map it out before the event so that you know the exact set up before you get there. Have the exact number of tables or displays for your set up. Also be sure that everything you need will fit into your vehicle.
Know if you will have use of only the front of your booth if space is limited or all 4 sides. Then plan your set up accordingly.
Have portable fold up tables. I use at least one 6-foot portable table or two 6-foot tables if I am in a corner space set up. If I am in an in-line space (only the front available to display, then I use the 6-foot table with two 4-foot tables, one on each side of the 6-foot table. Here are the tables that I purchased—they are durable and portable! https://amzn.to/3i7ml0O (click on the link for the 6-foot table). Here is the link for the 4-foot tables: https://amzn.to/3WVYT5p (click on the link). The height is adjustable for the 4-foot tables. Sometimes I can get more display space by putting a fold-up bench in front of the 6-foot table. Here is a link for the fold-up bench: https://amzn.to/3jFNatk (click on the link). This bench is very sturdy and can also be used to sit on.
Make sure to have attractive table cloths to cover your table. I use the stretch table cloths that can fit under the legs of the table or a fitted table cloth. The fitted and stretch table cloths are best for outdoors because they prevent the wind from continually blowing up the table cloth. The fit keeps the table cloth secure and under the table allowing for a sleek design. Here is my favorite table cloth that is fitted and can go under the table legs: https://amzn.to/3VETPRJ (click on the link). These do come in a variety of different colors. One thing with the stretch table cloths, the cloth can get worn out in the place where it stretches to go under the table leg. Instead of disposing of the table cloth, I use my handy sewing skills to simply stitch up any torn seam. This way, you will get many uses out of the table cloth.
Have folding chairs to sit on. The chairs that fold up are the best because they are portable. Here is my favorite fold up chair: https://amzn.to/3GxvOYt (click on the link). This one can also hold your drinks to keep hydrated!
Having heavy duty clamps to clamp down any displays to the table is a good idea. Here are the clamps that I use: https://amzn.to/3jIBvdp (click on the link). Zipties are also a great idea to tie things down: https://amzn.to/3IgnbTo (click on the link).
Be aware of the lighting of the event. If it is an outdoor setting then keep in mind the time of day that business will be conducted. If it takes place during the early morning or evening hours when there is little to no sun, then you will need lighting. Most times, there will be no electricity to plug in any type of lights, so battery powered lights would be best. Here are the battery powered lights that I purchased, they are long lasting and very bright: https://amzn.to/3G7Plxu (click on the link).
Be prepared for inclement weather. This includes direct sunlight. Know where the sun will be shining. Have tent walls that can block out the glaring sun to keep both you and your products shaded. Here are the tent walls that I use: https://amzn.to/3WPoPQ6 (click on the link). Have waterproof tent walls in the event of rain to protect yourself and your products. Have a wind mitigation strategy. In the event of heavy winds, you might not want to put up any tent walls as this creates a sail that can make your tent blow away very quickly. Have weights or clamps or ties to prevent your products from blowing down or away. I have used clear elastic to keep items from blowing out of bins and off of shelves. Clear elastic doesn’t detract from your display very much. Tie or weigh down anything that can become a projectile or flying hazzard.
Have tarp to lay down on the ground if it is the rainy season of the year. Here is a link to the tarp that I use: https://amzn.to/3IfWiiw (click on the link). The tarp comes in various sizes and can also be used as tent walls. I was once at an outdoor craft fair during monsoon-like weather. It was pouring. The tent was set up on a grassy area. The grassy area soon became like a river which was at least one foot of water. The tarp put down on the grass helped to keep us from flooding.
Have a battery operated fan or two if the weather is warm to help keep yourself cool. Here is my favorite battery-operated fan. https://amzn.to/3jHrwF2 (click on the link) It is fully rechargeable by plugging it into a regular USB charger (it comes with the cord). This fan has a hook that you can hang onto your tent. It also has a light, so it comes in handy for those night markets. Drink a lot of fluid throughout the day to keep hydrated.
Well, those are my few tips. I hope this is helpful a little. Best wishes to you all!

A tent can provide shade from the elements. Proper weights can prevent it from flying away.
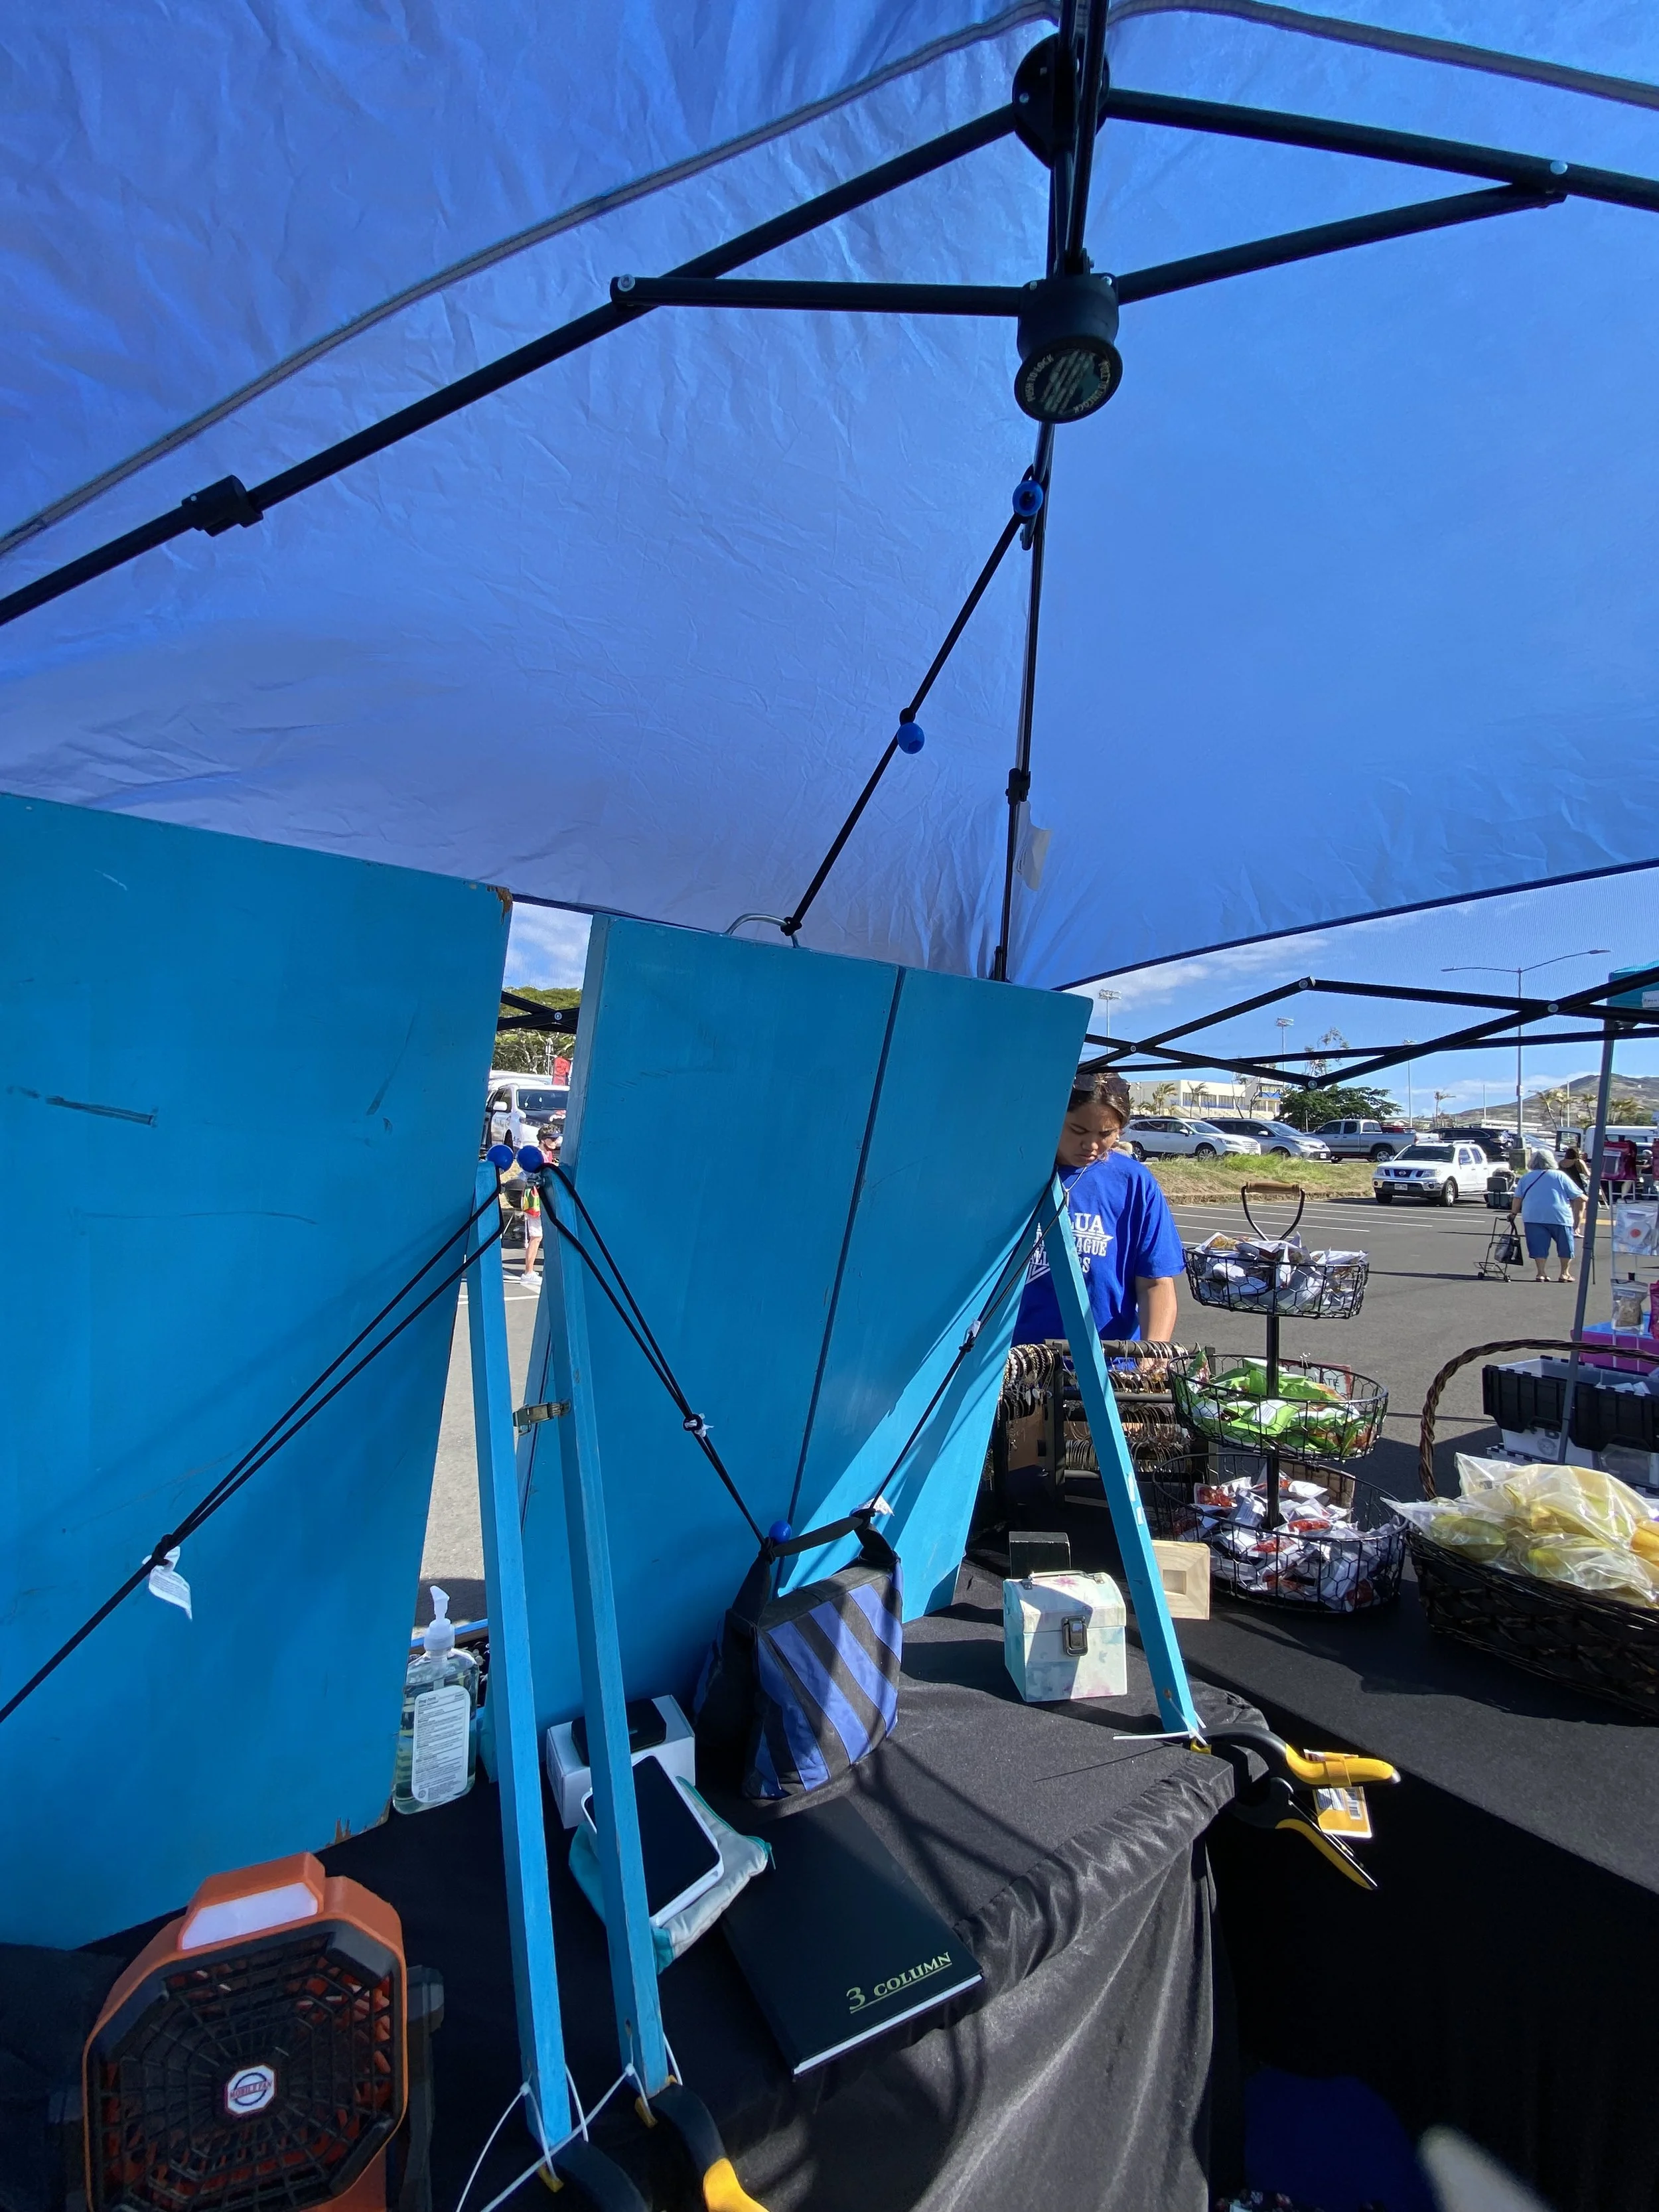
Adding weights and clamps to displays can help prevent the wind from blowing them down. A portable battery-operated fan can help to keep you cool.
Karen’s Oyster Chicken Recipe
This is a favorite recipe of mine and enjoyed by my family. Delicious and easy to make. This will be a meal that everyone will sure to enjoy!
Ingredients:
2 lbs. chicken wings (with the skin on it)
1/2 cup flour
1/2 tsp. black pepper
3 T sugar
1/2 Cup Oyster sauce (Lee Kum Kee is my favorite sauce)
1/3 Cup Water
1/2 Cup chopped green onions
Directions:
Cover the chicken wings with flour. Deep fry in vegetable oil for 20 minutes (or until evenly browned) at medium high heat or 350 degrees. Drain cooked chicken on paper towels to absorb the oil.
Cook the rest of the ingredients on low heat until ingredients are dissolved. Pour the sauce over the deep fried chicken to coat. Top with chopped green onions.
Enjoy!

Karen’s Oyster Chicken!
Preparing For The Made In Hawaii Festival 2022!
Well, the big Made In Hawaii Festival is this week! This is my first time ever participating in this magnificent event. This is probably the biggest craft show of the year and all things are Made In Hawaii. The dates for the Made In Hawaii Festival are November 11, 12, and 13, 2022. The hours are 11/11 10-6 PM, 11/12 9-6 PM, and 11/13 9-5 PM. Everyone needs a ticket to enter. It takes place at the Ala Moana Shopping Center on the 4th Floor of the Mauka Ewa Parking Structure. So, this festival is now 5 days away and here are my thoughts on how I am preparing for this huge event. First, I am really humbled to be a part of this festival. There will be so many wonderful artisans, chefs, entertainers. This will be my first ever 3-day event and I am hoping that I can have the endurance to give it my all there.
Here are some of the things I have done and am doing to prepare for this event. This event is the largest event I have ever participated in. Upwards of 40,000 people are anticipated to be in attendance. Here are my steps and tips for preparing for this large event and I suppose after this event is finished, I will have greater insights into what worked and what could be improved upon for the future.
Firstly, I read the thick manual of all of the rules and regulations and made sure that I am in compliance. This includes—
Liability insurance with the specifically named entities listed
General Excise Tax License
Formula sheets to ensure that my items meet the qualifications of being Made In Hawaii
Quality photos of my products
Social Media listings
The manual covers everything from Exhibitor Booth Package Inclusions, Accomodations, Advertising, Marketing & Public Relations, Booth location & personnel, cargo & shipping, Covid 19 Health Safety, Eating & Drinking by Exhibitors, Electricity, Elevators, Emergency Protocol and Evacuation Plan, Exhibior Entrance, Fire Extinguishers, Fork Lifts, Indemnification, Loading In/Setting Up/Move-In, Loading Out/Breakdown/MoveOut, Loading Dock, Parking and Traffic Flow, Plastic Bag Law and Bag Fee, Public Address System, Product Donations for Promotional Giveaways, Refrigeration/Freezer/Storage, Restrooms, Security, Storage and Re-Stocking of Merchandise, Tickets, Trade Show-Buyers Invitation, Trash, Water-Ice, Wi-fi, and other things to consider.
Each vendor should comb through the very detailed manual.
The formual sheets are used to determine Made In Hawaii Status. This entails going through each and every product you make and will be selling figuring out the materials cost, labor and other costs and filling out a formula sheet for each item. I used an excel sheet where I just plug in the numbers and the formula is automatically calculated. This formula sheet needed to be sent to the Made In Hawaii Festival staff and one needs to be printed out and kept on hand throughout the duration of the festival.
Next, from the time we were notified of acceptance into the festival, a lot of merchandise and products needed to be made. This time period encompased approximately 5 months. This is something I could not fathom. Having been a crafter for the past 8 years, I have always made products right before each craft fair. I have never had any back stock. So I set out on my journey to make as many products as I could given the time period.
Speaking to other vendors who have participated in the past, they were all wiped out at the end of the three long day festival. Vendors were offered hotel room rates at a huge discounted rate so I decided to take advantage of this and booked two nights at the Ala Moana Hotel to be able to rest inbetween and also to avoid the long commutes to and from the festival each day (yes, that amounts to about an hour and a half each day in Hawaii).
So, now it is five days away from the festival, move-in day is 3 days away. I took all of my stuff needed and put them all into large Ikea Bags to make transporting and storing easier. I went through my checklist of everything needed and now everything is packed and ready. Considering the event is taking place in a covered parking garage I made sure to pack battery-powered lights. Videos from the previous year at the same location look rather dark. I am hoping everything fits into my car!
Tickets purchased and registered, check. Helpers assigned, check.
Now, I am waiting with eager anticipation for this awesome event and this is a really historic time for Gifts By Karen M. I hope to see my loyal customers as well as meet new customers there.
I will post a blog on how it was at my very first Made In Hawaii Festival! Thanks for tuning in here!

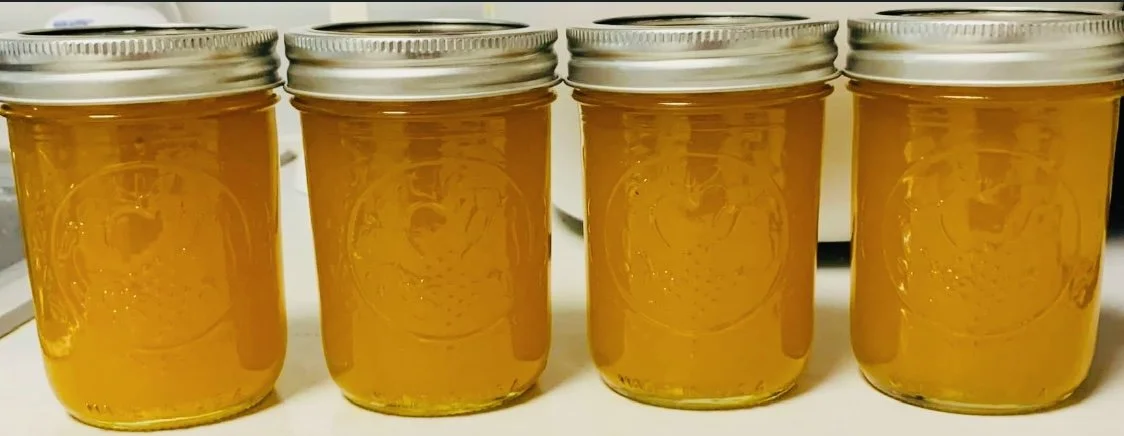
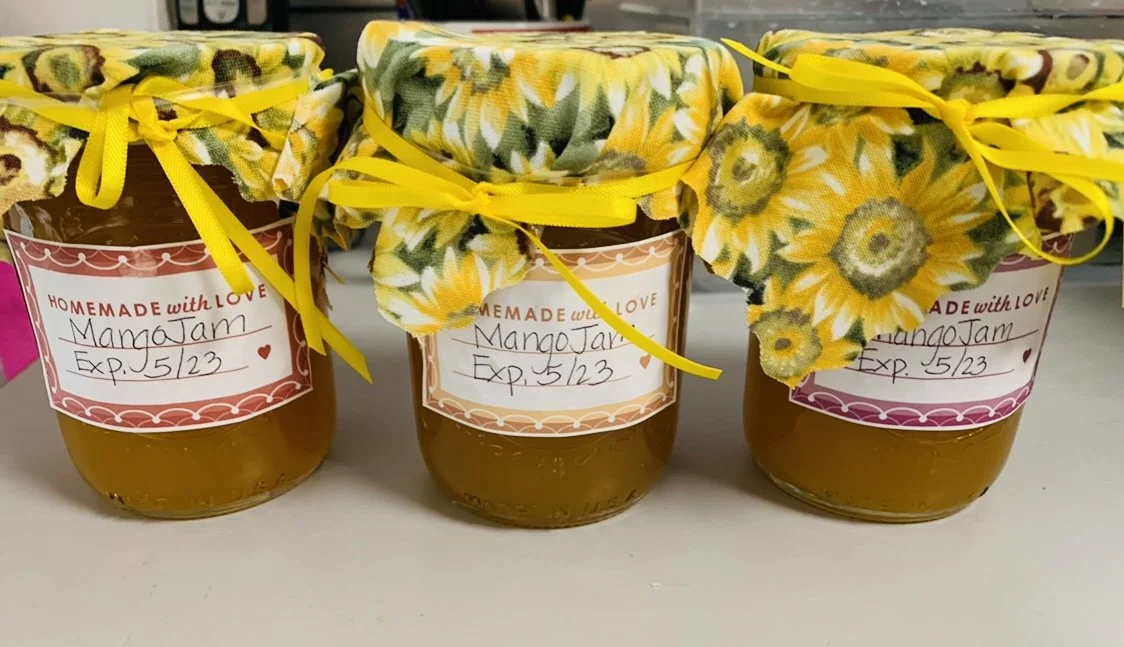
Karen’s Mango Jam Recipe
Hello everyone! Well, Mango season may have passed here in Hawaii (summer months) but there is always Mango around and people love to eat Mango Jam! When you make Mango Jam you can enjoy Mango all year round! Here is my Mango Jam Recipe.
Ingredients:
Peeled and puried fresh Mango (2 2/3 Cups)
Fruit Pectin (3 Tablespoons)
Butter (1/2 Teaspoon)
Granulated Sugar (3 1/3 Cups)
Directions:
In a large pot, heat to medium high heat. Sprinkle pectin even over the bottom of the pot. Add puried mangos evenly over the pectin. Add the butter. Stir for 21 minutes. Add sugar gradually. Cook for 4 more minutes. Pour into prepared jars or containers. Refrigerate for up to 3 weeks or serve immediately. You can also follow proper canning instructions and then the jam may be stored in sealed jars for up to 1 year in a cool dark place.
Hope you enjoy your homemade jam!
How To Sell More On Etsy
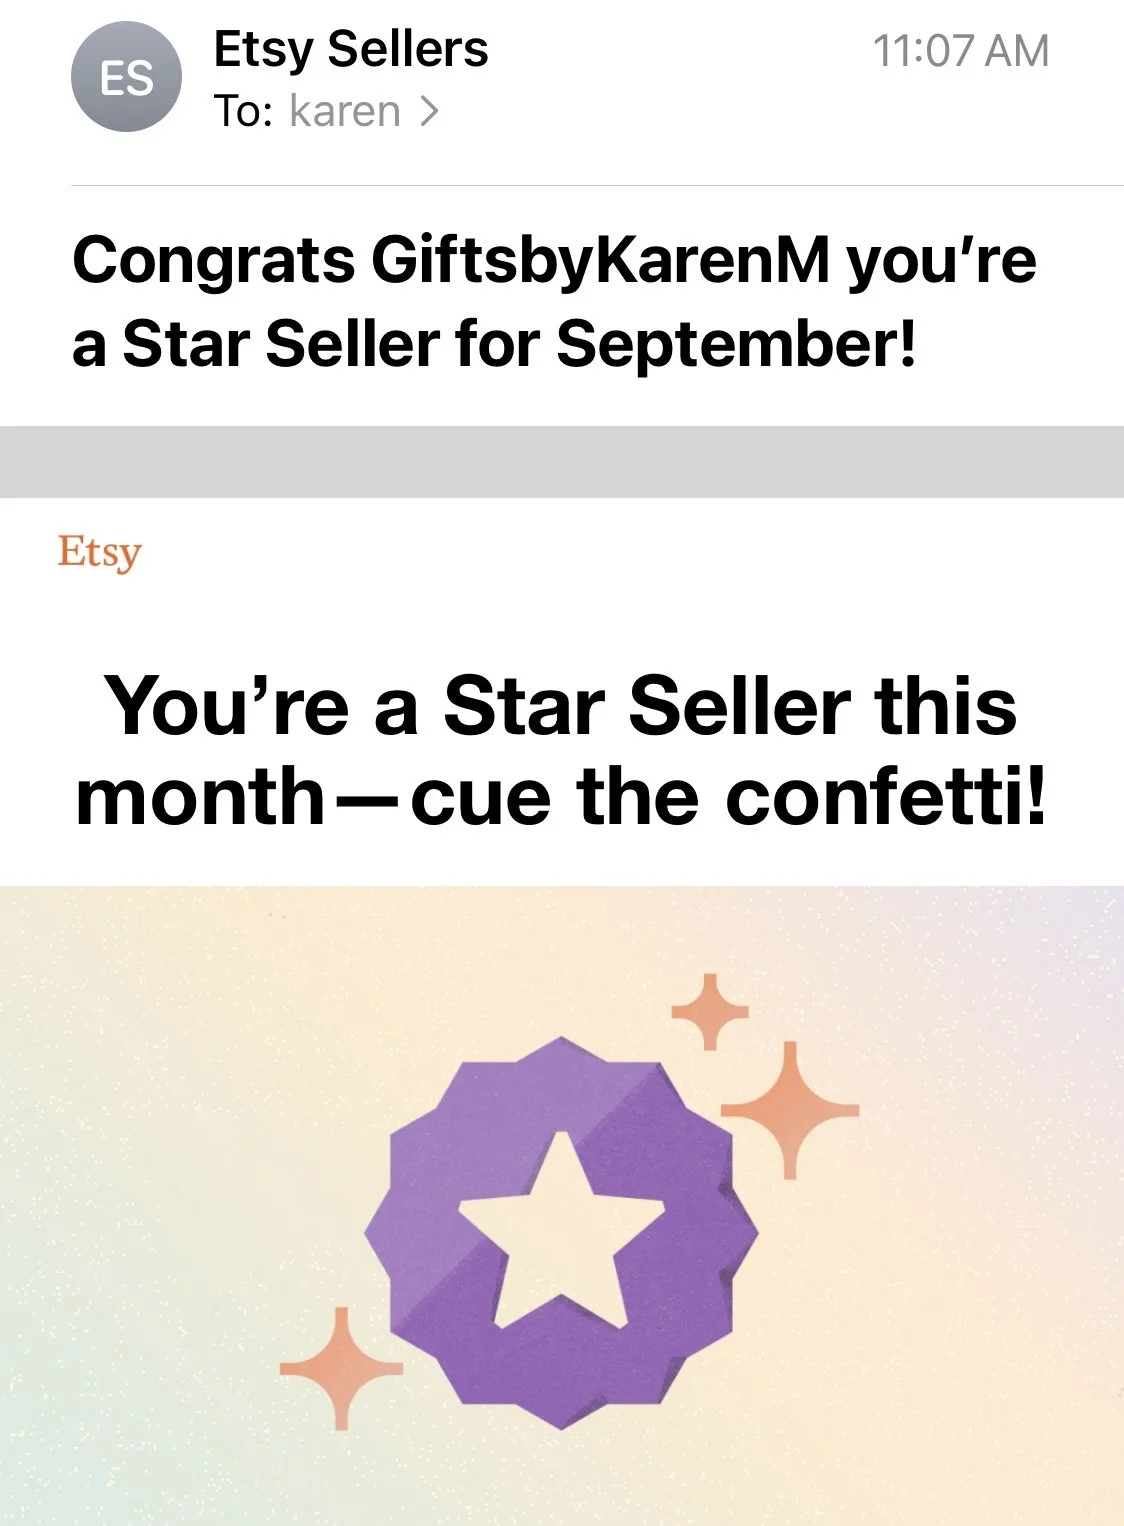
Here is my Blog on How To Sell More On Etsy! Do you sell on Etsy? Thinking of opening an Etsy Shop? Here are my tips on how to sell more on Etsy. I’ve been selling on Etsy since 2014 and I think I have been rather successful in this journey. I am a Star Seller and have over 10,000 sales thus far. Here are some helpful tips on what I believe will help you to sell more on Etsy. This is what I believe has worked for me and so here I am sharing it with you. I hope this helps!
Make and sell things that you are passionate about. What you create shows your motivation and passion. You will enjoy making your creations and orders and will not grow tired when you have a boom in sales and have to make the same thing over and over again.
Make your listings using all of the item descriptions available so that your items will wind up in the appropriate searches for your shop. Be descriptive in your item description listing the materials used, options, how it was made, what makes it special, and what value this will bring to the customer.
Have good customer service. There will be times when a customer is not happy fone reason or another. Go out of your way to resolve the issue being impartial and treat the situation as if the customer is always right (even if they are not!). This will help you to get good reviews and repeat customers. Personalize the customer’s shopping experience. This is what sets Etsy apart from other online markets—the personalization, care, and customization that you bring to the shopping experience.
Sell your creations at a fair and reasonable price. Yes, you need to make sure that you make a profit, but also be sure that your items are not overpriced. People shop around and if you offer a fair price they may purchase from you over another store that is higher priced.
Have good quality photographs of your creations that bring the product to life. Take several photos of our product from various perspectives. Ideally photos that show—the product with an object that shows the dimensions of the product, someone using or wearing the product, a photograph with a simple background, close up photo, distant photo, and one showing the various variations offered. Since people cannot handle the product or try it on in this online environment, you need to portray your product as best as possible.
Have clear return policies written. People want to know what to expect when they purchase from you and if they can return a product if not satisfied.
Answer messages and respond quickly to customers and potential customers.
Ship your products quickly. If the product is one for a special occasion, be sure to get in touch with the customer to see when it is needed and be sure to ship ahead of the needed date.
Test market your products before selling and posting online. I always sell at in-person events to see how various customers respond and react to different styles created. That way, when you do post an item, you know it has been tried and true. Find out what people think about your products. If something is not selling, don’t make any more of them! If something is selling, make more of those. Oftentimes, what you enjoy making is not what people will buy. Start to enjoy making what people like to buy.
Use paid advertising. When I first opened my Etsy Shop, I didn’t have any sales for that whole first year. Then, I decided that my goal for the next year was going to be to build up my Etsy Shop and sales. I paid for the Etsy Paid Advertising. Within that first month, the following year, wellah—I received my first sale! I was ecstatic! I didn’t know what to do! That second year, was a good one. I studied tips by other sellers on how to make more sales on Etsy. Etsy is a great platform to sell on. You will come to find out what your best seller is. This is one that sells over and over again year after year. It is timeless. You will find that some products are fads, they sell well at one point in time, and then not so much later on. There may be various seasons that you have more sales in depending upon what you sell. Know your seasons. During the slow periods is when you should develop new products and work on building up your stock and supply for the busy seasons. Persevere through the seasons. You may have months where you make $15,000-$20,000 in sales and months where you make $500-$1000 in sales. Keep learning and growing and you will not fail. Best wishes!!!
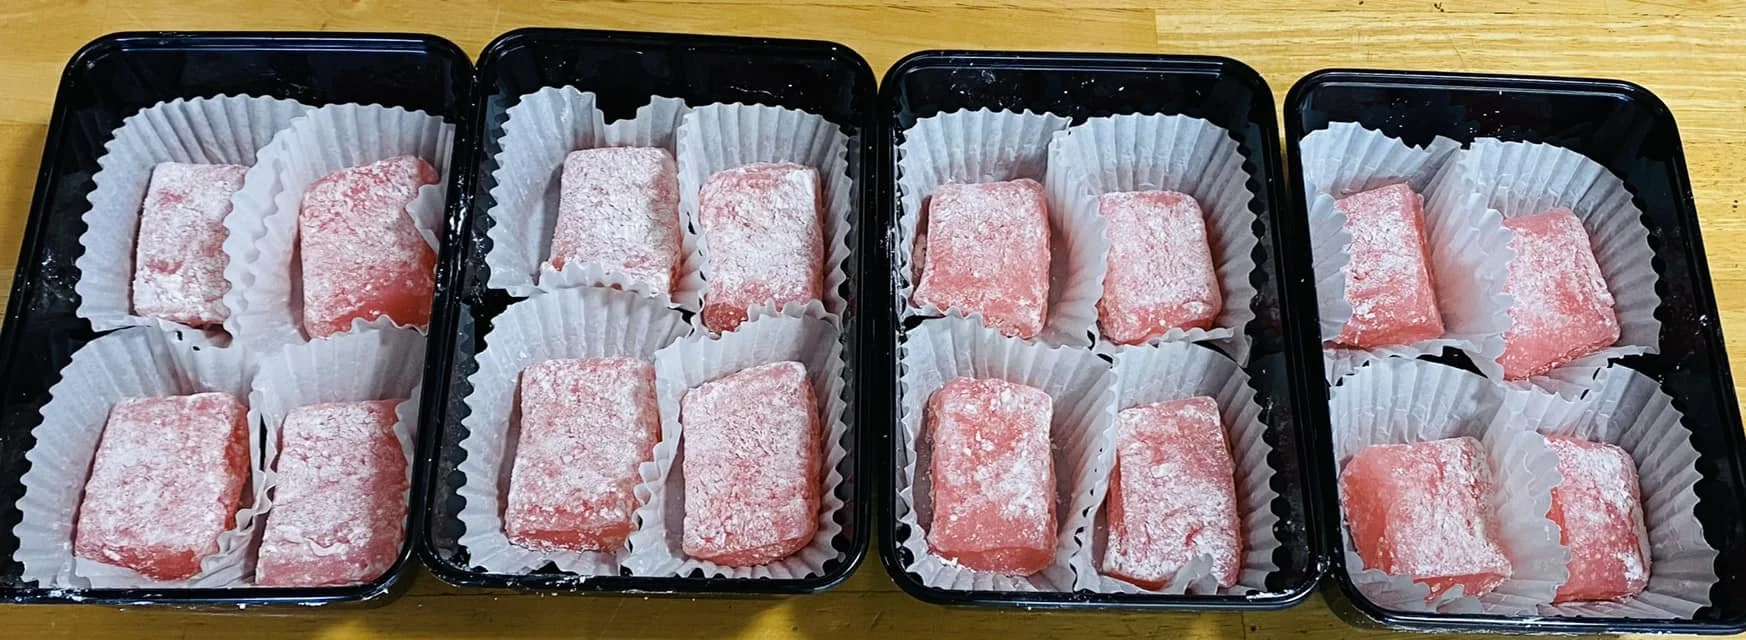
Karen’s Lilikoi Mochi Recipe
It’s that time of year when Lilikoi is in season! Lilikoi Mochi is a favorite here in Hawaii. Here is a simple recipe that you can make and enjoy all of the delicious Lilikoi that has been growing in your garden!
Ingredients:
2 Cups Mochiko
1 1/2 Cups Sugar
2 Cups Lililoi Juice (Fresh squeezed)
1 Cup Cornstarch
Directions:
Grease a 9x9 inch pyrex dish. Mix together the sugar, mochiko and Lilikoi Juice. Mix until well blended. Pour batter into the pyrex dish and cover with plastic wrap. Put into the microwave oven for 10 minutes on medium-high heat. Remove and let cool. Put the cooked mochi onto a cutting board lined with cornstarch and cust into small pieces. Dust with cornstarch to prevent pieces from sticking. Eat and enjoy!

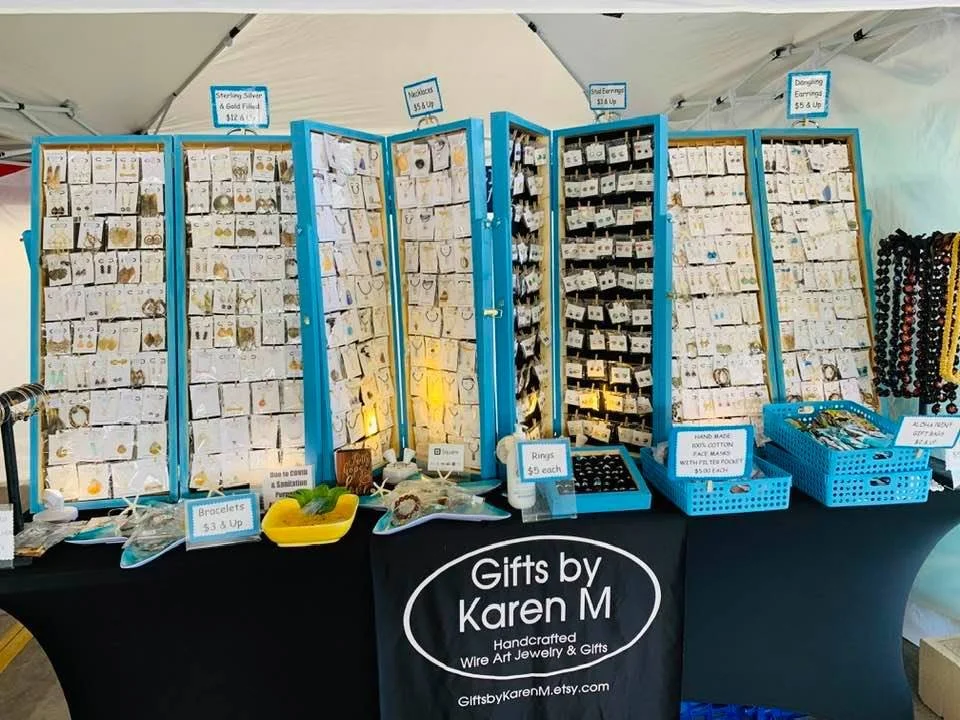
5 Benefits Of Participating In Craft Shows
Craft Shows
Participating in craft shows helps the crafter to get products out into the public. Selling at craft shows is a unique opportunity to meet your customers, present your work, and receive feedback and new ideas.
Customers are the backbone of your business. Without customers, your products will not find a home. There is nothing better than meeting your customers up front and in person.
There have been many times where customers have been looking for something specific and I have been able to create a new design tailored to my customers. These designs have then gone on to be wildlly popular with other customers. If I had not participated in live craft shows, I would never have known the personal preferences of my customers. The first benefit of participating in craft shows is that you get ideas for new designs from meeting your customers.
The second benefit of participating in craft shows is that you gain perspectives on how your customers like their products first hand. This past weekend I participated as a vendor at the Pearl City Ben Franklin Vendor Trunk Show. You need to rent a locker space with the Ben Franklin Store in order to be able to participate as a vendor in the trunk show outside of the store. This trunk show is a wonderful opportunity to showcase your work. At this trunk show, I met a nice gentleman looking for a bracelet. I asked if he was looking for a gift for his girlfriend and he replied that he was looking for a bracelet for himself. I was able to assist him with finding the right bracelet for him and was even able to size it to fit him on the spot with my handy tools (always carry your tools to events in case you might need to alter or customize designs to fit individual customers). He walked away very happy. A little while later, he returned, this time with his girlfriend. He told me how his girlfriend “stole” his bracelet and so now he needed to get a new bracelet for himself. I was again able to find him another bracelet similar to the first one he purchased but this time found an even chunkier bracelet that he was so happy with. Both of them walked away very happy. You will not get these experiences selling online. In-person events give you the personalization and feel that is representative of a handmade business.
A third benefit of participating in craft shows is that you may receive requests for custom orders. I have received customer orders from customers at events. While participating in the Pearl City Ben Franklin Vendor Trunk Show one weekend I met a customer looking for 5 of the same necklace for her grandchildren. I only had one available on display. I was able to take her payment in advance and then create four more of the same necklace for her to pick up the following weekend. I would not have received this customer request had I not been at this vendor event.
A fourth benefit of participating in craft shows is that you get to network with people. Today, I was participating in the Kapolei Ono Grindz and Makeke Pop Up event at the Kapolei Commons in Kapolei Hawaii. It was a beautiful setting, gorgeous sun, breezy tradewinds, and bright blue sky. It got hot later in the day. I saw a gentlement standing in the shade of my tent and he said he was trying to get some shade while waiting for his wife. I asked him if he would like to look at some of my jewelry. He replied that he did. He told me he was a scuba diver instructor and that he had a large collection of shells that he just gives away to people. I told him that I was always looking for shells to make my jewelry. So he is going to send me pictures of his shells and I will have the unique opportunity to purchase beautiful shells that he collects on his diving expeditions.
A fifth benefit of participating in craft shows is that you meet other vendors. I have become friends with many vendors that are at the same events. This is very beneficial because they share with you the events that are happening and also the inside scoops on which events are the most profitable. I have greatly benefited from this inside information.
Crafting is a great hobby, business, and social outlet. It is something that can be very enjoyable. Participating in live craft shows gets the artisan involved with customers, fellow vendors, and you will experience opportunities you would never have encountered had you not been there. Participating in Craft Shows is highly beneficial! Best wishes to you!

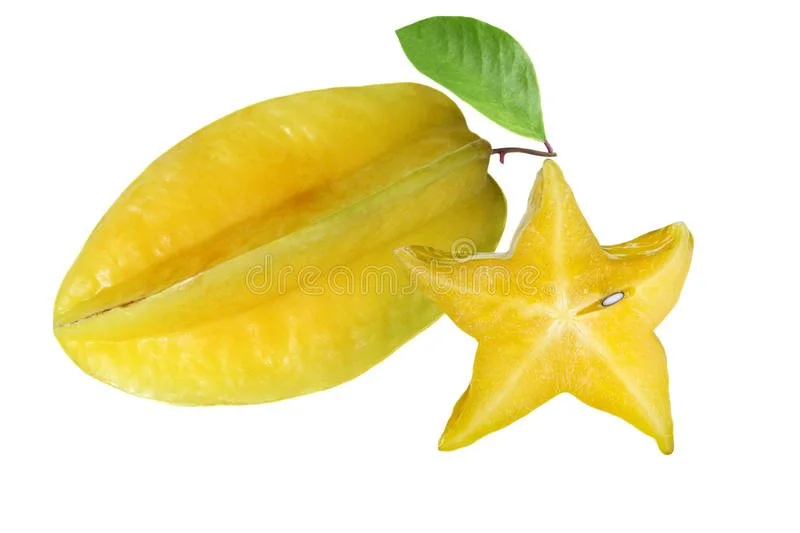
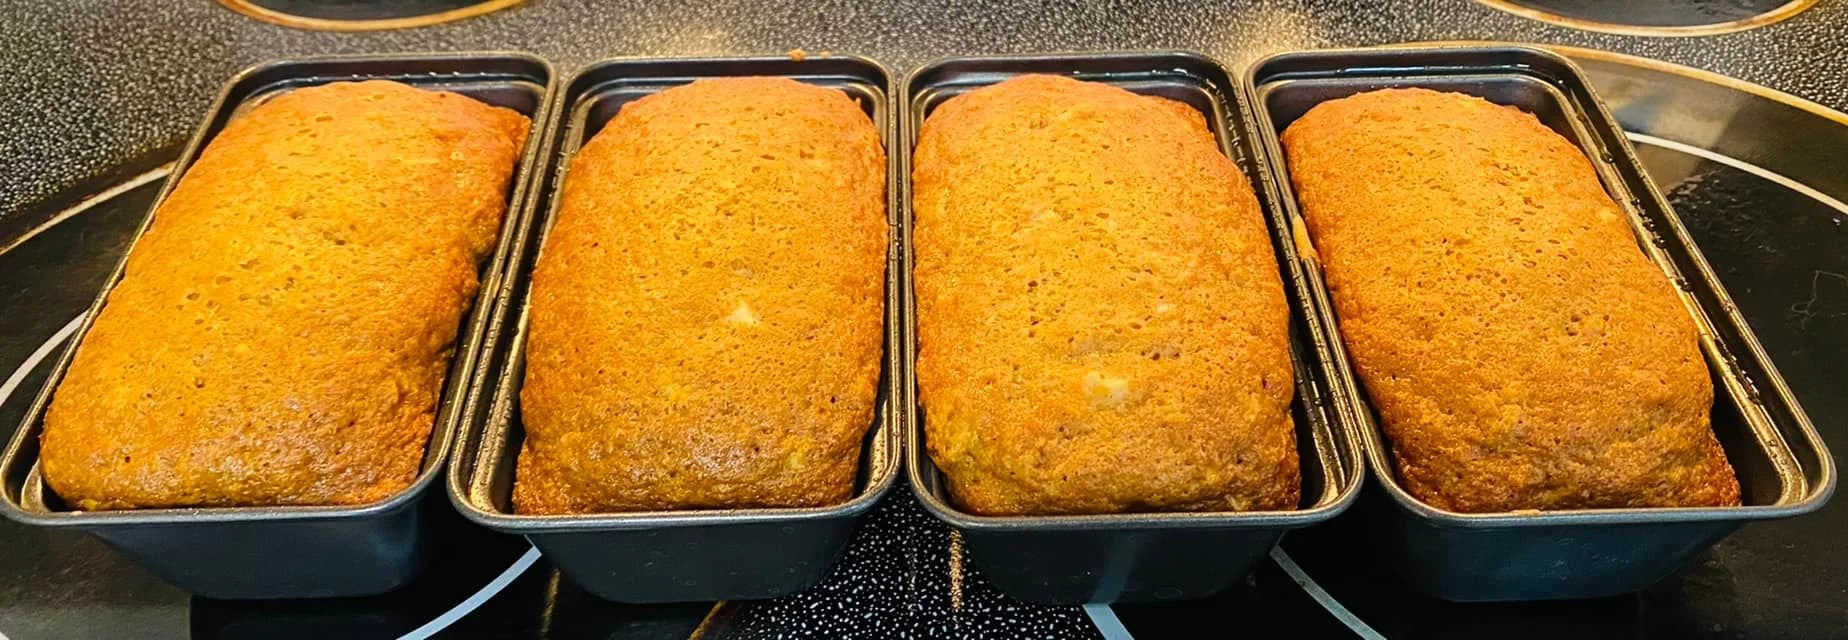
Karen’s Starfruit Bread Recipe
It all begins with an idea.
It’s Starfruit Season! Everyone with a starfruit tree knows that the tree can be very fruitful at this time of the year. We don’t want any of it to go to waste. This Starfruit Bread Recipe is very delicious and it uses simple ingredients that can be readily found in your pantry.
Ingredients:
1 Cup Starfruit Puree
1 Cup Sugar
3/4 Cup Milk
1 Large Egg
2 Cups Flour
3/4 Teaspoon Salt
1 Teaspoon Baking Powder
1 Teaspoon Baking Soda
1/2 Teaspoon Ground or Fresh Ginger
1/2 Teaspoon Cinnamon
1/4 Cup Raisins
Directions:
Preheat the over to 350 F and grease one loaf pan 9x5x3 inches. Combine the puree, sugar, milk, and egg in a large mixing bowl. In a separate bowl, combine the remaining dry ingredients and mix well. Slowly add the dry ingredients to the wet, and stir until everything is moistened. Pour into the loaf pan and bake until a toothpick inserted into the middle comes out clean. Bake about 35-40 minutes. Remove from the over and allow to cool completely before serving.

10 Tips to Make More $ Money at Craft Fairs
It all begins with an idea.
Calling all crafters! So, you’ve created your wonderful crafts and are ready to sell them and make some $$$ money! Money generated from Craft Fair Sales can be a side hustle, it can also support your hobby so that you can make more crafts. Here are 10 tips to make more money at craft fairs.
Research the craft fair you are signing up for. Attend it at least once and see how crowded it is and also the demographics of shoppers. Are the shoppers in attendance likely to purchase your crafts? Also, see if the craft fair organizer has a good following and does a lot of advertising. It is not uncommon to sign up for a craft fair and then find out that there are very few people in attendance. Make sure the craft fair you sign up for is well established.
Know your best sellers and make a lot of them. This means that you have already discovered what your best seller is. Your best seller is something people have purchased enthusiastically in the past. This product is tested over time.
Label your products with prices that are readily visible to the customer. If the fair is crowded, customers might not wait around to ask what the price is of a particular item they are interested. Be sure to post clear signs of product prices.
Have adequate lighting. Find out if there is lighting at the fair you will be participating in. Even if there is indoor lighting, extra spot lights and lighting at your booth will attract customers. You may strategically place spotlights to highlight featured items in your booth.
Place small and expensive items in front of you to prevent theft and losing money. Small and expensive items tend to “walk away." You might consider locking up expensive items in a small locking case to prevent theft.
Be sure you have branding in your booth with your company name attractively displayed in a professionally-made sign. This will make your booth look professional and trust-worthy.
Have business cards on hand. Customers often want to order something at a later time and contact you.
Have some form of credit card, cash app, or venmo payment form accepted. Customers will spend more when there are options to purchase other than just cash.
Make products at various price points to cater to all types of buyers. Have low-cost items as well as higher-priced items for those looking for a special gift for themselves or a loved one.
Have your booth displayed in an interesting and attractive manner utilizing various props and at various heights. If the fair is outdoors and windy, be sure to weight down your displays so that things don’t go crashing down with a gust of wind. Practice setting up your display at home prior to the craft fair and take a picture of your set up so that you remember how it looked.

Karen’s Coconut Mochi
It all begins with an idea.
Here in Hawaii everyone loves to each mochi. So, why not make it yourself? This is a very quick and easy coconut mochi recipet that will be ready in minutes for you to enjoy. Instead of buying, why not DIY? Enjoy!
Ingredients:
1 1/4 Cup Mochiko
13.5 oz Coconut Milk
1 Cup Sugar
1/2 Teaspoon Vanilla
5 Drops Red Food Coloring
Cornstarch
Directions:
Grease a 10x10” pyrex pan. Combine all of the ingredients except the cornstarch in a bowl. Mix well. Pour the battern into the pyrex pan. Cover the pan with a plastic wrap. Microwave at medium high for 10 minutes. Let it cool. Pull the mochi from the sides of the pan and put onto a cutting board covered with the cornstarch. Cut into small pieces. Coat all sides with the cornstarch. Eat & enjoy!